The Ford Crown Victoria⁚ A Timeless Classic
The Ford Crown Victoria, a full-size sedan known for its robust build, comfortable interior, and long-lasting reliability, left an indelible mark on American automotive history․ This article delves into the legacy of this iconic vehicle, exploring its origins, design, performance, and cultural impact․
Introduction
The Ford Crown Victoria, a name synonymous with reliability and durability, holds a special place in the hearts of many car enthusiasts․ This full-size sedan, known for its distinctive body-on-frame construction and powerful V8 engine, became a staple on American roads, serving as a trusted mode of transportation for families, businesses, and law enforcement agencies alike․ The Crown Victoria, affectionately nicknamed the “Crown Vic,” was a testament to Ford’s engineering prowess, a vehicle that combined practicality with a touch of classic elegance․ Its enduring popularity stemmed not only from its robust build and dependable performance but also from its spacious interior and surprisingly comfortable ride․ The Crown Victoria’s legacy is one of reliability, comfort, and a touch of Americana, making it a true classic that continues to be admired by car enthusiasts even after its production ceased in 2011․
This article delves into the fascinating world of the Ford Crown Victoria, exploring its history, design, performance, and cultural impact․ We will uncover the secrets behind its enduring popularity, from its sturdy body-on-frame construction to its powerful engine options, and delve into the modifications that made it a favorite among enthusiasts․ We will also examine the Crown Victoria’s role in popular culture, from its iconic status as a police cruiser to its appearances in movies and television shows․ Join us as we embark on a journey through the captivating history of the Ford Crown Victoria, a vehicle that left an enduring mark on the automotive landscape․
History and Background
The Ford Crown Victoria’s roots can be traced back to the 1950s, with the introduction of the Ford Fairlane, a mid-size car that would later evolve into the full-size Ford LTD․ In 1979, Ford introduced the LTD Crown Victoria, a luxurious and spacious sedan that established the foundation for the iconic Crown Victoria that would become synonymous with American car culture․ The Crown Victoria’s design, featuring a boxy and robust body style, appealed to consumers seeking both comfort and practicality․ The car’s spacious interior and generous trunk space made it ideal for families and individuals looking for a reliable and comfortable mode of transportation․ The Crown Victoria was also popular among businesses, with its durable construction and long-lasting engine proving to be highly reliable for fleet use․
However, it was the Crown Victoria’s adoption by law enforcement agencies that truly propelled it to iconic status․ Its sturdy build, powerful V8 engine, and roomy interior made it an ideal police cruiser, and it quickly became the go-to vehicle for police departments across the country․ The Crown Victoria’s association with law enforcement solidified its place in popular culture, becoming a symbol of authority and safety․ The car’s distinctive design, with its signature rear taillights and chrome accents, made it instantly recognizable, and its reputation for durability and performance made it a trusted workhorse for law enforcement officers․ The Crown Victoria’s enduring popularity as a police cruiser further cemented its legacy as a true American classic․
Design and Features
The Ford Crown Victoria’s design was a testament to its intended purpose⁚ ruggedness and functionality․ The body-on-frame construction, a hallmark of American full-size cars of the era, provided a robust foundation, capable of handling the rigors of daily driving and the demanding conditions of police duty․ The Crown Victoria’s exterior featured a boxy and upright design, with a long wheelbase that contributed to its spacious interior and comfortable ride․ The large grille, prominent headlights, and distinctive rear taillights were instantly recognizable, establishing the Crown Victoria’s unique aesthetic․ The interior, while not overly luxurious, was functional and comfortable, offering ample space for passengers and cargo․
The Crown Victoria’s design was not merely about aesthetics․ Its practicality extended to its features․ The car was equipped with a range of standard and optional features, catering to both civilian and law enforcement needs․ These features included power steering, power brakes, air conditioning, and a range of safety features such as anti-lock brakes and airbags․ The Crown Victoria’s design prioritized durability, reliability, and safety, ensuring its longevity and making it a trusted vehicle for both everyday driving and specialized applications․
Body-on-Frame Construction
The Ford Crown Victoria’s body-on-frame construction was a defining characteristic of its design, contributing significantly to its ruggedness and durability․ This construction method involved a separate chassis or frame, onto which the body was mounted․ The frame, typically made of steel, provided a rigid foundation that could withstand the stresses of heavy loads, rough roads, and demanding driving conditions․ This construction method, common in full-size American cars of the era, ensured that the Crown Victoria possessed a sturdy and durable structure․
The body-on-frame construction also allowed for a more spacious interior, as the frame did not intrude into the passenger cabin․ Moreover, it facilitated the installation of heavy-duty components, such as large engines and suspensions, without compromising the structural integrity of the vehicle․ This construction method, while contributing to the Crown Victoria’s weight, ensured its durability and resilience, making it a reliable choice for both civilian and law enforcement applications․
Engine Options
The Ford Crown Victoria was renowned for its powerful V8 engine options, providing ample torque and horsepower for its size․ Throughout its production run, the Crown Victoria was equipped with a variety of V8 engines, each offering a distinct balance of performance and fuel efficiency․ The 4․6L Modular V8 engine, introduced in 1997, became the mainstay of the Crown Victoria lineup․ This engine, known for its smooth operation and robust construction, delivered reliable performance with a power output that was sufficient for both everyday driving and demanding situations․ The 4․6L V8, in its various iterations, offered a blend of power and efficiency, making it a suitable choice for a wide range of driving needs․
The Crown Victoria’s engine options were designed to provide a combination of power and durability․ The robust construction of these engines, coupled with their proven reliability, contributed to the Crown Victoria’s reputation as a long-lasting and dependable vehicle․ Whether serving as a family sedan or a police cruiser, the Crown Victoria’s engine options played a crucial role in its overall performance and longevity․ The availability of these powerful V8 engines, in conjunction with the Crown Victoria’s body-on-frame construction, solidified its position as a robust and reliable vehicle․
Transmission Options
The Ford Crown Victoria, known for its robust build and powerful V8 engine options, was paired with a range of automatic transmissions designed for smooth shifting and dependable performance․ The Crown Victoria primarily utilized the 4-speed 4R70W automatic transmission, a reliable unit known for its durability and smooth shifting characteristics․ This transmission, designed to handle the substantial torque generated by the V8 engines, provided a seamless transition between gears, ensuring a comfortable and efficient driving experience․ The 4R70W, with its proven reliability, was a key component in the Crown Victoria’s reputation for long-lasting durability․
The Crown Victoria’s transmission options were carefully selected to complement its powerful V8 engines and robust build․ The 4-speed automatic transmission, specifically the 4R70W, was a reliable choice, providing smooth shifting and efficient performance․ This transmission, coupled with the powerful V8 engine options, allowed the Crown Victoria to effortlessly handle various driving conditions, from everyday commutes to long-distance trips․ The Crown Victoria’s transmission options played a significant role in its overall performance and longevity, contributing to its reputation as a dependable and long-lasting vehicle․
Performance and Handling
The Ford Crown Victoria, though not designed for sporty handling, offered a capable and comfortable driving experience․ Its body-on-frame construction, while contributing to its durability, resulted in a somewhat less agile handling compared to unibody vehicles․ However, the Crown Victoria’s inherent stability and predictable behavior made it a reliable choice for long drives and everyday commutes․ The powerful V8 engines, available in various displacements, provided ample power for acceleration and highway cruising․ This combination of robust power and a comfortable ride made the Crown Victoria a suitable choice for those prioritizing a comfortable and reliable driving experience․
The Crown Victoria’s performance was characterized by its smooth acceleration and ample power, thanks to its V8 engine options․ The vehicle’s handling, while not overly sporty, offered a comfortable and predictable driving experience․ Its robust construction and well-tuned suspension provided a stable ride, suitable for long-distance travel and daily commutes․ The Crown Victoria’s performance and handling characteristics were designed to prioritize comfort and dependability, making it a popular choice for those seeking a reliable and comfortable full-size sedan․
Reliability and Durability
The Ford Crown Victoria earned a reputation for its exceptional reliability and durability, a testament to its robust design and simple mechanical components․ The body-on-frame construction, a hallmark of American full-size sedans of the era, provided a solid foundation for the vehicle, contributing to its structural integrity and resistance to wear and tear․ The Crown Victoria’s engines, known for their simplicity and durability, were renowned for their longevity and resistance to mechanical issues․ The vehicle’s suspension, a well-engineered combination of coil springs and shock absorbers, proved to be both comfortable and dependable, enduring the rigors of daily use and various road conditions․
The Crown Victoria’s reputation for reliability and durability stemmed from its robust design and straightforward mechanical components․ The vehicle’s body-on-frame construction, a hallmark of its era, provided a solid foundation, contributing to its structural integrity and resistance to wear and tear․ The Crown Victoria’s engines, known for their simplicity and durability, were renowned for their longevity and resistance to mechanical issues․ The vehicle’s suspension, a well-engineered combination of coil springs and shock absorbers, proved to be both comfortable and dependable, enduring the rigors of daily use and various road conditions․
Popular Modifications
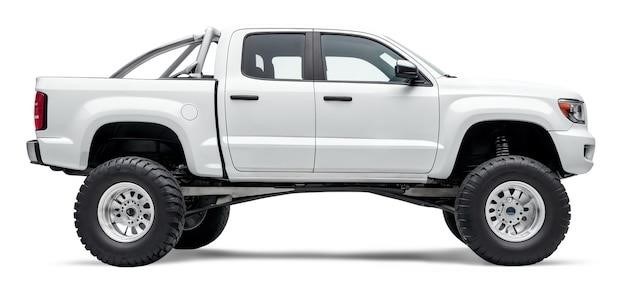
The Ford Crown Victoria, with its robust construction and simple mechanics, became a popular choice for customization and performance upgrades․ Owners often sought to enhance the vehicle’s performance, handling, and aesthetics․ Common modifications included engine upgrades, such as installing a performance exhaust system, cold air intake, or a more powerful engine․ Suspension upgrades were also popular, with owners opting for lowering springs, adjustable shocks, or performance sway bars to improve handling and cornering․ Visual modifications ranged from custom wheels and tires to body kits and paint jobs, allowing owners to personalize their Crown Victorias to their liking․
Many enthusiasts focused on enhancing the vehicle’s performance, handling, and aesthetics․ Common modifications included engine upgrades, such as installing a performance exhaust system, cold air intake, or a more powerful engine․ Suspension upgrades were also popular, with owners opting for lowering springs, adjustable shocks, or performance sway bars to improve handling and cornering․ Visual modifications ranged from custom wheels and tires to body kits and paint jobs, allowing owners to personalize their Crown Victorias to their liking․
The Crown Victoria in Popular Culture
The Ford Crown Victoria transcended its role as a mere vehicle, becoming a cultural icon deeply ingrained in American society․ Its association with law enforcement, specifically its widespread use as a police cruiser, cemented its image as a symbol of authority and order․ Its imposing presence and recognizable silhouette made it a fixture in countless movies, TV shows, and video games, often serving as a visual representation of crime dramas, action sequences, and law enforcement narratives․
Beyond its law enforcement role, the Crown Victoria also gained popularity among taxi drivers, its spacious interior and durable build making it ideal for passenger transportation․ Its prominence in popular culture further solidified its status as a familiar and recognizable vehicle, making it an enduring part of American automotive history․ The Crown Victoria’s legacy extends beyond its functional purpose, reflecting a cultural identity and a sense of nostalgia for a bygone era․
The End of an Era
In 2011, after a remarkable 28-year production run, the Ford Crown Victoria’s reign came to an end․ The decision to discontinue the model was driven by a confluence of factors, including evolving safety regulations, rising fuel prices, and shifting consumer preferences․ The Crown Victoria’s body-on-frame construction, while robust and durable, was deemed less crash-worthy than newer unibody designs, prompting a shift towards more modern vehicles․ The Crown Victoria’s fuel-thirsty V8 engine also became a liability in an era of increasing fuel economy standards․
The Crown Victoria’s departure marked the end of an era for full-size sedans, leaving a void in the market for those seeking a blend of practicality, durability, and comfort․ Its legacy, however, continues to resonate with enthusiasts who appreciate its timeless design, robust construction, and cultural significance․ The Crown Victoria’s impact on American automotive history remains undeniable, solidifying its place as a cherished classic․
The Ford Crown Victoria, a true icon of American automotive history, left an indelible mark on the industry and on the hearts of countless drivers․ Its robust construction, comfortable interior, and enduring reliability made it a favorite among law enforcement agencies, taxi fleets, and families alike․ While its production may have ceased, the Crown Victoria’s legacy continues to thrive, inspiring enthusiasts and collectors to appreciate its timeless design and unwavering dependability․
The Crown Victoria stands as a testament to the enduring appeal of simplicity and practicality․ Its unassuming design, coupled with its powerful V8 engine and sturdy body-on-frame construction, provided a driving experience that was both satisfying and reassuring․ As the automotive landscape evolves, the Crown Victoria’s influence remains evident in the design and engineering of modern vehicles, a tribute to its timeless appeal and enduring legacy․