Bosch Serie 2 Dishwasher Manual PDF: A Comprehensive Guide
Discover essential guidance for your appliance! This comprehensive PDF manual details operation, safety, Home Connect setup, and troubleshooting for optimal performance and longevity.
Understanding Your Bosch Serie 2 Dishwasher
Congratulations on selecting a Bosch Serie 2 dishwasher! This appliance represents a significant investment in kitchen convenience and efficiency. Before initial use, thoroughly reviewing the provided instruction manual is paramount. It contains vital safety information and operational details to ensure optimal performance and longevity.
Familiarize yourself with the dishwasher’s components, including the spray arms, filter system, and detergent dispenser. Understanding how the sensors function is also crucial; they intelligently adjust cycles based on soil levels. Remember, pre-rinsing is generally unnecessary – the sensors are designed to handle typical food residue. Proper loading techniques, detailed within the manual, maximize cleaning effectiveness and prevent damage to your dishware.
Locating the Bosch Serie 2 Dishwasher Manual PDF
Finding your Bosch Serie 2 dishwasher’s manual in PDF format is straightforward. Begin by visiting the official Bosch Home Appliances website. Navigate to the ‘Support’ or ‘Service’ section, then search for ‘dishwashers.’ Input your specific model number (found on the appliance’s rating plate) to refine the results.
Alternatively, a general web search using terms like “Bosch Serie 2 dishwasher manual PDF” will yield numerous links. Ensure the source is reputable – the official Bosch website is always the most reliable. Download the PDF and save it for future reference. Having a digital copy readily available allows for quick access to troubleshooting tips, operating instructions, and safety guidelines, enhancing your dishwasher experience.
First-Time Use & Safety Information
Before operating your Bosch Serie 2 dishwasher for the first time, carefully review the included instruction manual and its crucial safety information. This initial step ensures proper installation and prevents potential hazards. Prior to loading, inspect the interior for any packaging materials or debris.
Familiarize yourself with the detergent compartment and recommended detergent types. Always adhere to safety precautions regarding water connections and electrical supply. Never allow children to operate the dishwasher unsupervised. Ensure proper grounding to avoid electrical shock. Following these guidelines guarantees a safe and efficient start with your new appliance, maximizing its lifespan and performance.

Home Connect Setup & Mobile App Integration
Enhance your dishwasher experience with Home Connect! This feature allows convenient control and monitoring via a mobile device. The Bosch Serie 2 dishwasher manual PDF details a simple setup process. Begin by downloading the Home Connect app to your smartphone or tablet and following the on-screen instructions.
Connecting your dishwasher to the app unlocks remote start, cycle monitoring, and customized settings. Ensure a stable Wi-Fi connection during setup. The manual provides troubleshooting tips for connectivity issues. Leverage the app to receive notifications about cycle completion and maintenance needs, optimizing convenience and appliance care.
Installing the Home Connect App
Begin your smart dishwasher journey by installing the Home Connect app. This is the first step towards remote control and monitoring. Locate the app on the Apple App Store (iOS devices) or Google Play Store (Android devices). Search for “Home Connect” and select the official Bosch Siemens Home Appliances app.
Tap “Install” and allow the app to download and install on your device. Once installed, open the app and follow the guided registration process. You’ll need to create a Home Connect account or log in if you already have one. The Bosch Serie 2 dishwasher manual PDF provides screenshots and detailed instructions for a smooth installation process, ensuring seamless integration.
Connecting Your Dishwasher to the App
After installing and setting up the Home Connect app, connect your Bosch Serie 2 dishwasher. Ensure your dishwasher is powered on and connected to your home’s Wi-Fi network. Within the Home Connect app, select “Add Appliance” and follow the on-screen prompts. The app will search for compatible appliances on your network.

Once your dishwasher is detected, select it from the list. You may be prompted to enter your dishwasher’s Wi-Fi password (if applicable) or scan a QR code located on the appliance. The Bosch Serie 2 dishwasher manual PDF details this process visually. Successful connection unlocks remote control, cycle monitoring, and access to smart features.
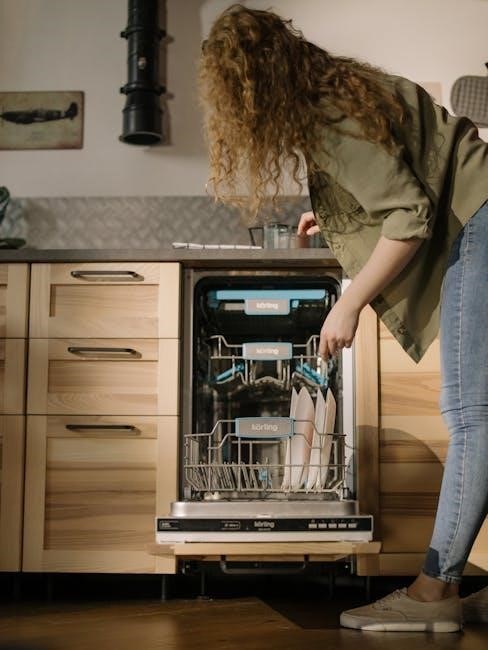
Loading Your Dishwasher Correctly
Proper loading maximizes cleaning performance and prevents damage. Avoid pre-rinsing dishware; Bosch sensors intelligently adjust cycles based on soiling levels. Removing large food remnants is sufficient. Arrange items to allow water circulation – don’t overcrowd! Place dishes facing the spray arms.
Fragile glassware and smaller items should be secured in the upper rack. Larger pots and pans belong in the lower rack. The Bosch Serie 2 dishwasher manual PDF provides detailed diagrams illustrating optimal loading patterns. Incorrect placement can lead to inadequate cleaning or breakage, so consult the manual for guidance.
Avoiding Pre-Rinsing of Dishware

Pre-rinsing is generally unnecessary and can actually reduce cleaning effectiveness with your Bosch Serie 2 dishwasher. The integrated sensors are designed to detect the level of soiling and adjust the wash cycle accordingly. If dishes are already exceptionally clean, the sensors may select a lighter, less intensive cycle.
Simply scrape off large food particles before loading. The dishwasher performs best when it can assess the actual dirt level. As the manual PDF explains, excessive pre-cleaning can mislead the sensors, resulting in suboptimal results and wasted water and energy. Trust the technology!
Proper Placement of Dishware & Items
Optimal loading is crucial for thorough cleaning. Avoid overcrowding; dishes need space for water circulation. The Bosch Serie 2 dishwasher manual PDF emphasizes not placing items where they obstruct the spray arms. Ensure tall items don’t block detergent dispensing.
Fragrance dispensers and dishware should not be placed in the tab collecting tray. Position items securely to prevent movement during the cycle. Refer to the manual’s diagrams for recommended arrangements of plates, glasses, and cutlery. Correct placement maximizes cleaning performance and minimizes the risk of damage to your valuable dishware.
Understanding Sensor Technology & Cycles
Bosch Serie 2 dishwashers utilize advanced sensor technology to optimize wash cycles. These sensors detect the level of soiling and adjust water usage and cycle duration accordingly. If dishware appears pre-cleaned too intensively, the sensors will automatically select a lighter cycle to conserve resources.
However, the manual notes that stubborn food remnants may not be entirely removed in such cases. The system is designed to respond to cleanliness levels, not necessarily to remove heavily soiled items. Understanding this interaction ensures realistic expectations and efficient operation, as detailed in the Bosch Serie 2 dishwasher manual PDF.
How Sensors Adjust Cycles
The Bosch Serie 2 dishwasher’s sensors continuously monitor water turbidity – the cloudiness caused by food particles. Based on this measurement, the control unit dynamically adjusts the wash cycle. A higher turbidity level signals heavier soiling, prompting the dishwasher to increase water intake, extend the wash duration, and intensify the cleaning action.
Conversely, if the sensors detect clean water, indicating lightly soiled dishes, the cycle is shortened, and water consumption is reduced. This intelligent adaptation, explained in the Bosch Serie 2 dishwasher manual PDF, ensures efficient cleaning while minimizing resource usage, providing optimal results for varying load types.
Addressing Stubborn Food Remnants
Despite the advanced sensor technology, exceptionally stubborn food remnants may occasionally require pre-treatment. The Bosch Serie 2 dishwasher manual PDF advises against intensive pre-rinsing, as sensors rely on detecting soiling to optimize cycles. However, removing large food particles – bones, pits, or excessive scraps – is recommended.

If remnants persist after a cycle, consider utilizing a more intensive wash program or employing a dedicated dishwasher cleaner. The manual details specific programs suited for heavily soiled items. Remember, sensors may choose a lighter cycle if pre-cleaning is too thorough, hindering effective cleaning of remaining debris.
Preventing Glassware Clouding
Clouding on glassware is a common concern, often stemming from the use of unsuitable dishware or hard water conditions. The Bosch Serie 2 dishwasher manual PDF emphasizes using only dishwasher-proof glassware; items not designed for machine washing are prone to etching and irreversible clouding.
Furthermore, the manual recommends checking water hardness settings and adjusting them accordingly. Hard water can contribute to film buildup. If clouding occurs despite using appropriate glassware and correct settings, the manual notes that some damage may be irreversible. Regular use of rinse aid, as detailed in the manual, can help mitigate this issue and maintain glassware clarity.
Dishwasher-Proof Glassware Only
The Bosch Serie 2 dishwasher manual PDF strongly advises using only glassware explicitly labeled as “dishwasher-safe.” Utilizing non-suitable glasses can lead to permanent etching and clouding, a result of the dishwasher detergents and high temperatures. The manual clarifies that not all glass is created equal; some materials are simply too delicate for machine washing.
It’s crucial to check the manufacturer’s markings on each glass item before loading. Avoid placing crystal, hand-blown glass, or antique glassware in the dishwasher. The manual details that irreversible clouding occurs when the glass surface is damaged, and this damage cannot be repaired. Prioritizing dishwasher-proof items protects your valuable glassware.

Addressing Irreversible Clouding Issues
The Bosch Serie 2 dishwasher manual PDF acknowledges that, unfortunately, irreversible clouding of glassware sometimes occurs. This damage stems from using non-dishwasher-proof glass, or from prolonged exposure to harsh detergents and high temperatures. Once the glass surface is etched, restoring clarity isn’t possible; the manual doesn’t offer solutions for repair.
Prevention is key. The manual emphasizes consistently using only dishwasher-safe glassware. If clouding develops despite precautions, it confirms the glassware wasn’t suitable for machine washing. While the manual doesn’t provide remedies for existing clouding, it strongly advises against continuing to wash affected items, as it will worsen the condition. Replacement is the only viable option.
Troubleshooting Common Issues
The Bosch Serie 2 dishwasher manual PDF provides guidance for resolving frequent problems. A primary concern is dishware not being cleaned intensively enough. The manual explains this often indicates pre-cleaning was too thorough; sensors detect cleanliness and select lighter cycles. If stubborn remnants persist, avoid pre-rinsing – only remove large food particles.
The manual also details potential causes for incomplete cleaning, such as incorrect loading or insufficient detergent. It stresses checking spray arms for blockages and verifying the water hardness setting is accurate. For more complex issues, the manual directs users to error code explanations, offering specific troubleshooting steps for each code displayed on the appliance.
Dishware Not Cleaned Intensively Enough
The Bosch Serie 2 dishwasher manual PDF addresses this common issue, explaining that seemingly clean dishes can result from overly diligent pre-rinsing. The dishwasher’s sensors are designed to detect the level of soiling; if items appear pre-cleaned, they’ll be washed on a gentler, shorter cycle.

To resolve this, the manual recommends only removing large food remnants before loading, and skipping the pre-rinse altogether. It also advises checking the spray arms for obstructions and ensuring proper detergent usage. If remnants remain after a cycle, the manual suggests verifying the selected program is appropriate for the level of soiling and considering a more intensive wash.
Maintenance & Cleaning
The Bosch Serie 2 dishwasher manual PDF emphasizes regular maintenance for peak performance. Key areas include filter cleaning – a crucial step to prevent blockages and ensure efficient water circulation. The manual provides detailed instructions and diagrams for filter removal and cleaning.
Additionally, the guide stresses the importance of inspecting and cleaning the spray arms, removing any debris that could obstruct water flow. Regular cleaning of the dishwasher’s interior with a designated cleaner is also recommended. Following these steps, as outlined in the PDF, will prolong the dishwasher’s lifespan and maintain optimal cleaning results, preventing issues like poor cleaning performance.
Detergent Usage & Recommendations
The Bosch Serie 2 dishwasher manual PDF provides detailed guidance on detergent usage, emphasizing the importance of using only dishwasher-specific detergents. It cautions against using hand dish soap, as it creates excessive suds that can damage the appliance. The manual recommends the appropriate amount of detergent based on water hardness and the level of soiling.
Furthermore, it advises against overfilling the detergent dispenser, as this can lead to residue on dishes. The PDF also highlights the benefits of using rinse aid for improved drying and to prevent water spots. Following these recommendations ensures optimal cleaning performance and protects the dishwasher from potential damage, extending its operational life.
Understanding Error Codes
The Bosch Serie 2 dishwasher manual PDF dedicates a section to deciphering error codes, crucial for self-diagnosis and troubleshooting. These codes, displayed on the appliance’s control panel, indicate specific issues ranging from water supply problems to drainage malfunctions. The manual provides a comprehensive list, explaining each code’s meaning and suggesting potential solutions.
For example, a specific code might signal a blocked filter, while another could indicate a faulty water inlet valve. The PDF emphasizes that some errors can be resolved by the user, such as clearing a blockage, while others require professional service. Understanding these codes empowers owners to address minor issues independently and communicate effectively with technicians when necessary.
Water Hardness Settings & Adjustment
The Bosch Serie 2 dishwasher manual PDF highlights the importance of correctly setting the water hardness level for optimal cleaning performance and to prevent limescale buildup. Hard water contains minerals that can leave spots on dishes and reduce the dishwasher’s efficiency. The manual guides users through a simple water hardness test, often using a test strip, to determine their local water hardness.
Based on the test results, the manual instructs how to adjust the dishwasher’s internal settings. This adjustment controls the amount of rinse aid dispensed and the water temperature during cycles. Incorrect settings can lead to poor cleaning or limescale accumulation, shortening the appliance’s lifespan. Regular adjustment ensures sparkling clean dishes and prolonged dishwasher health.
Filter Cleaning & Replacement
The Bosch Serie 2 dishwasher manual PDF emphasizes regular filter cleaning as crucial for maintaining optimal performance. Food particles and debris accumulate in the filter, hindering water circulation and reducing cleaning effectiveness. The manual provides detailed, illustrated instructions on how to locate, remove, and thoroughly clean the filter system – typically a combination of a coarse filter and a fine filter.

It also outlines the frequency of cleaning, recommending checks after each wash cycle and a more thorough cleaning at least every six months, depending on usage. The manual details how to identify when filter replacement is necessary, usually indicated by cracks or persistent clogging. Proper filter maintenance prevents blockages and ensures consistently clean dishes.
Spray Arm Inspection & Cleaning
The Bosch Serie 2 dishwasher manual PDF highlights the importance of regularly inspecting and cleaning the spray arms. Blocked spray arm nozzles significantly reduce cleaning performance, leading to food residue on dishes. The manual provides clear instructions on how to safely remove the upper and lower spray arms, typically involving a simple unlocking mechanism.
It details how to identify and clear any blockages in the nozzles, often caused by hard water deposits or food particles, using a toothpick or fine wire. The manual stresses the need to avoid damaging the nozzles during cleaning. Regular inspection and cleaning of the spray arms ensure optimal water distribution and effective dishwashing results, maintaining the appliance’s efficiency.
Professional Operating Instructions
The Bosch Serie 2 Dishwasher Manual PDF includes a dedicated section for professional operators, detailing advanced functions and diagnostic procedures. This section assumes familiarity with dishwasher technology and focuses on efficient troubleshooting and maintenance. It outlines specific error code interpretations beyond the standard user guide, enabling quicker diagnosis of complex issues.

Professionals will find detailed information on accessing service menus for calibration and testing, as well as procedures for component replacement. The manual emphasizes safety precautions for servicing, including electrical disconnection protocols. This specialized content allows technicians to perform comprehensive repairs and ensure optimal performance of the Bosch Serie 2 dishwasher, maximizing uptime and customer satisfaction.
Bosch Serie 4 Comparison (SPS46IW01E)
While the Bosch Serie 2 dishwasher manual PDF provides comprehensive guidance for its models, understanding the differences with the Serie 4 (like the SPS46IW01E) can be beneficial. The Serie 4 generally offers enhanced features such as more advanced wash cycles, improved drying performance, and potentially, a larger capacity. The SPS46IW01E, as noted in available resources, represents a step up in functionality.
Key distinctions include potentially quieter operation and more sophisticated sensor technology in the Serie 4. Users seeking a more premium experience might consider the Serie 4, but the Serie 2 remains a reliable and efficient option. Referencing both manuals highlights these differences, aiding informed decision-making regarding features and performance expectations.
Community Resources & Support
Beyond the Bosch Serie 2 dishwasher manual PDF, a wealth of community resources exists to assist users. Online forums and dedicated Bosch support communities provide platforms for sharing experiences, troubleshooting issues, and seeking advice from fellow owners. These platforms often contain solutions to common problems not explicitly detailed in the manual.
Bosch’s official website offers extensive FAQs, video tutorials, and direct access to customer support representatives. Social media channels also serve as valuable avenues for quick assistance and updates. Engaging with these resources can significantly enhance your dishwasher experience, offering peer-to-peer support and expert guidance when needed, complementing the information within the PDF manual.