Category Archive Manuals

Bykyler

nr 600 bike light manual

NR 600 Micro Bike Light Manual⁚ A Comprehensive Guide

This comprehensive guide will delve into the intricacies of the NR 600 Micro Bike Light, providing you with all the information you need to maximize its performance and safety features. From unboxing and initial setup to troubleshooting common issues, this manual will ensure you get the most out of your bike light and enjoy safe and enjoyable night rides.

Introduction to the NR 600 Micro Bike Light

The NR 600 Micro Bike Light is a compact and powerful lighting solution designed for cyclists who prioritize visibility and safety on their rides. It’s a versatile light that can be used for various cycling activities, from urban commuting to off-road adventures. The NR 600 Micro Bike Light is a compact, excessive-performance biking accessory designed for amateur and expert cyclists. This small, lightweight and compact self-contained light is perfect for handlebar or helmet mounting (helmet mount sold separately) and is perfect for MTB, Road, Urban / Commuter, Bike packing, Touring and more.

This light utilizes a collimator lens that creates a brilliant, even light beam pattern, ensuring optimal visibility for both the rider and those around them. The NR 600 Micro Bike Light is a must-have for cyclists who want to ride with confidence, knowing they are visible to others and can navigate any terrain with ease.

Key Features of the NR 600 Micro Bike Light

The NR 600 Micro Bike Light boasts a range of impressive features that make it a top choice for cyclists looking for a reliable and versatile lighting solution. Here are some of its key highlights⁚

  • Powerful Illumination⁚ The NR 600 Micro Bike Light delivers a bright and focused beam of light, ensuring optimal visibility in low-light conditions. This feature allows you to navigate trails and roads with confidence, even in the darkest of nights.
  • Compact and Lightweight Design⁚ The NR 600 Micro Bike Light is designed to be compact and lightweight, making it easy to transport and mount on your bike. Its small size does not compromise its performance, making it an ideal choice for cyclists who prioritize portability and convenience.
  • Multiple Operating Modes⁚ The NR 600 Micro Bike Light offers various operating modes, including high, medium, low, and flash. This allows you to adjust the brightness level to suit your specific riding conditions and preferences, ensuring optimal visibility and battery life.
  • Durable Construction⁚ The NR 600 Micro Bike Light is built to withstand the rigors of cycling, with a durable construction that can handle bumps and vibrations. This ensures that your light will remain functional and reliable, even on challenging terrains.
  • Easy to Use⁚ The NR 600 Micro Bike Light is designed for ease of use, with a simple interface that allows you to switch between modes and adjust brightness levels with ease. This makes it an ideal choice for both beginner and experienced cyclists.

Unboxing and Initial Setup

Getting your NR 600 Micro Bike Light ready for use is a simple and straightforward process. Follow these steps to unbox and set up your light⁚

  1. Unpack the Contents⁚ Carefully remove the NR 600 Micro Bike Light from its packaging. You should find the following items⁚ the light unit itself, a USB charging cable, a handlebar mount, and a user manual.
  2. Charge the Battery⁚ Before using your light for the first time, it’s essential to fully charge the battery. Connect the USB charging cable to the light and plug the other end into a power source. The charging indicator on the light will typically turn red while charging and turn green when the battery is fully charged.
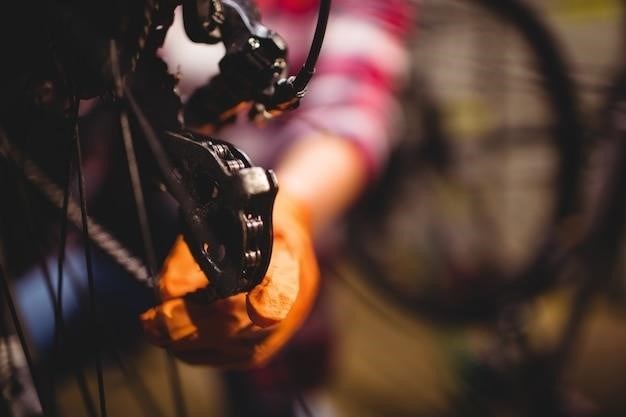
  3. Mount the Light⁚ The NR 600 Micro Bike Light comes with a handlebar mount for easy installation. Secure the mount to your handlebar using the included hardware. Ensure that the mount is securely fastened and positioned where it won’t obstruct your view or interfere with your handlebars.
  4. Attach the Light⁚ Once the mount is installed, simply click the NR 600 Micro Bike Light into the mount. The light should be securely attached and ready for use.
  5. Test the Light⁚ After setting up your light, turn it on and test all the operating modes to ensure everything is working correctly. Adjust the brightness level to your desired setting and familiarize yourself with the light’s features.

With your NR 600 Micro Bike Light properly set up and charged, you’re ready to enjoy safe and well-lit rides, even in the darkest conditions.

How to Mount the NR 600 Micro Bike Light

Mounting your NR 600 Micro Bike Light is a simple process that ensures a secure and stable installation for optimal illumination. Follow these steps to properly mount your light⁚

  1. Choose Your Mounting Location⁚ The most common mounting location for the NR 600 Micro Bike Light is on the handlebars of your bicycle. Select a spot that provides a clear view of the road ahead and doesn’t obstruct your handlebars or other controls. You can also mount the light on your helmet for a different perspective.
  2. Install the Handlebar Mount⁚ The NR 600 Micro Bike Light comes with a dedicated handlebar mount. Secure the mount to your handlebars using the included hardware. Ensure the mount is firmly attached and positioned correctly before proceeding.
  3. Attach the Light to the Mount⁚ Once the mount is installed, you can easily attach the NR 600 Micro Bike Light. Simply align the light’s base with the mount and press it in place. You should hear a secure click when the light is properly attached.
  4. Adjust the Angle⁚ After mounting the light, adjust its angle to direct the beam of light effectively. Ensure that the light is pointed straight ahead and illuminates the path in front of you without blinding oncoming traffic.
  5. Test the Mount⁚ Before heading out on a ride, gently test the mount to ensure the light is secure and won’t loosen or fall off during your ride. You can do this by shaking the handlebars or tilting your bike slightly.

By following these steps, you can ensure that your NR 600 Micro Bike Light is properly mounted, providing optimal illumination and visibility during your rides.

Operating Modes and Brightness Settings

The NR 600 Micro Bike Light offers multiple operating modes and brightness settings to cater to various riding conditions and preferences. Understanding these modes will help you optimize your light’s performance and battery life.

  • High Mode⁚ This mode provides the maximum light output of the NR 600 Micro Bike Light, ideal for illuminating dark roads or trails. It delivers a powerful beam that allows you to see further ahead and navigate confidently.
  • Medium Mode⁚ Medium mode offers a balance between brightness and battery life. It provides sufficient illumination for most riding conditions, allowing you to see clearly without consuming too much power.
  • Low Mode⁚ This mode provides a gentle, low-intensity beam, perfect for urban riding or when you need minimal illumination. It helps you stay visible to others without overwhelming them with excessive brightness.
  • Flash Mode⁚ Flash mode utilizes a flashing light pattern to increase your visibility to other road users. It is particularly helpful in dense traffic or when you want to make yourself stand out.

The NR 600 Micro Bike Light typically features a button or switch on its body to cycle through these modes. Refer to the user manual for specific instructions on how to change modes and adjust brightness settings. Remember to choose the mode that best suits your riding needs and environment.

Battery Life and Charging

The NR 600 Micro Bike Light typically utilizes a rechargeable battery to power its illumination. The battery life and charging time can vary depending on the specific model and its features. To ensure optimal performance and extend the battery’s lifespan, it’s crucial to understand its charging requirements and usage habits.

The NR 600 Micro Bike Light’s battery life is generally measured in hours of continuous use. The actual runtime can vary depending on the selected brightness mode. Higher brightness settings consume more power and will result in a shorter battery life. It’s a good practice to conserve battery power by choosing the appropriate mode for your riding conditions.

Charging the NR 600 Micro Bike Light is typically done using a USB cable. Connect the USB cable to the light’s charging port and plug the other end into a power source, such as a computer or wall adapter. The charging time will vary depending on the battery capacity and the power source used. The user manual should provide specific charging instructions and estimated timeframes.

To maximize battery life, it’s recommended to charge the light fully after each use. Avoid overcharging the battery, as it can shorten its lifespan. Additionally, store the light in a cool, dry place when not in use to prevent battery degradation.

Maintenance Tips

Regular maintenance is key to ensuring your NR 600 Micro Bike Light continues to perform at its best and remains reliable for your cycling adventures. Here are some maintenance tips to keep your light shining bright and safe⁚

Clean the lens⁚ The lens of your bike light can accumulate dirt, grime, and debris, which can obstruct the light beam and reduce visibility. Use a soft cloth or microfiber lens cleaning tissue to gently wipe away any dirt or smudges. Avoid using harsh chemicals or abrasive materials that could scratch the lens.

Check the mounting system⁚ The mounting system, whether it’s a handlebar mount or helmet mount, should be inspected regularly for any signs of wear or looseness. Tighten any loose screws or bolts and ensure the mount is securely attached to your bike or helmet. A loose mount could lead to the light detaching while riding, posing a safety hazard.

Store properly⁚ When not in use, store your NR 600 Micro Bike Light in a cool, dry place. Avoid exposing it to extreme temperatures or direct sunlight, which can damage the battery or electronics.

Battery care⁚ Follow the charging instructions provided in the user manual to ensure proper battery care. Avoid overcharging or completely draining the battery, as this can shorten its lifespan. If you notice a significant decrease in battery life, it might be time to consider replacing the battery.

Replace worn parts⁚ Over time, some parts of your bike light, such as the rubber seals or the charging port cover, may wear out. Replace these parts as needed to maintain the light’s functionality and water resistance;

Troubleshooting Common Issues

While the NR 600 Micro Bike Light is designed for reliability, you might encounter some common issues. Here’s a guide to help you troubleshoot and resolve them⁚

Light won’t turn on⁚ The most common culprit is a depleted battery. Ensure the light is properly connected to the charging cable and plugged into a power source. If the light still doesn’t turn on, try replacing the battery. If the battery is new and the light remains inactive, there might be an issue with the charging port or the internal circuitry. Contact the manufacturer for further assistance.

Light flickers or dims⁚ A flickering or dimming light could indicate a low battery. Charge the light fully to see if the issue resolves. If the problem persists, the battery might be damaged or nearing the end of its lifespan. Consider replacing the battery. Another potential cause could be a loose connection in the charging port or the mounting system. Check for any loose wires or connections and tighten them securely.

Light won’t charge⁚ Ensure the charging cable is securely plugged into the light and the power source. Try a different charging cable or power source to rule out any issues with those components. If the light still doesn’t charge, the charging port might be damaged. Contact the manufacturer for repair or replacement options.

Light won’t mount properly⁚ Ensure the mounting system is correctly aligned and securely attached to your bike or helmet. If the mount is loose or misaligned, tighten any screws or bolts and ensure the mount is properly positioned. If the mount is damaged, replace it with a new one.

If you’re unable to resolve the issue after troubleshooting, it’s advisable to contact the manufacturer for further assistance or consider seeking professional repair services.

Bykyler

24 inch craftsman snowblower manual

Craftsman 24 Inch Snowblower Manual⁚ A Comprehensive Guide

This manual provides a comprehensive guide to using and maintaining your Craftsman 24 inch snowblower. It covers everything from safety precautions to troubleshooting and repairs, ensuring you can get the most out of your snowblower and keep it running smoothly throughout the winter.

Introduction

Welcome to the world of snow removal with your Craftsman 24-inch snowblower! This powerful and reliable machine is designed to tackle even the most challenging winter conditions, keeping your driveway, walkways, and sidewalks clear and safe. This manual serves as your comprehensive guide to understanding, operating, and maintaining your Craftsman 24-inch snowblower. It’s essential to familiarize yourself with the information presented here to ensure safe and efficient operation, maximizing the lifespan of your machine. From assembly and setup to troubleshooting and maintenance, this manual covers everything you need to know to become a snow-clearing pro.

This user manual provides detailed instructions and diagrams to guide you through every step. It will help you understand the features and controls, how to assemble and prepare your snowblower for use, and how to operate it safely and effectively. It also includes a comprehensive maintenance schedule to ensure your snowblower remains in top condition throughout the winter season.

Safety Precautions

Operating a snowblower requires a high level of caution and adherence to safety guidelines; This section highlights crucial safety measures to ensure your well-being and prevent accidents while using your Craftsman 24-inch snowblower.

Before Starting⁚

  • Read and understand this entire manual before operating your snowblower.
  • Always wear appropriate safety gear, including eye protection, gloves, and sturdy footwear.
  • Clear the area around your snowblower of debris, obstacles, and loose objects that could be thrown by the auger.
  • Never operate the snowblower on slopes steeper than 15 degrees.
  • Inspect the snowblower for any damage or loose parts before starting.
  • Ensure the area is well-lit if operating in low-light conditions.

During Operation⁚

  • Keep hands and feet clear of the auger and discharge chute openings.
  • Never attempt to clear a clogged discharge chute with your hands. Use the provided clean-out tool.
  • Be aware of your surroundings and avoid operating near pedestrians or other objects.
  • If the snowblower starts to vibrate excessively, stop immediately and inspect for any problems.
  • Never operate the snowblower if you are tired or under the influence of alcohol or drugs.

Assembly and Setup

Assembling and setting up your Craftsman 24-inch snowblower is a straightforward process. This section provides step-by-step instructions to ensure proper assembly and prepare your snowblower for operation.

Removing from Carton⁚

  • Cut the corners of the carton and lay the sides flat on the ground.
  • Remove and discard all packing inserts.
  • Carefully lift the snowblower out of the carton.
  • Ensure the carton is completely emptied before discarding it.

Assembly⁚

  • Position the chute assembly over the base, ensuring the flange keepers securely click into place.
  • Attach the chute directional control to the lower bracket and secure with the provided flat washer and hairpin clip.
  • The clean-out tool is fastened to the top of the auger housing with a mounting clip. Cut the cable tie at the factory before operating the snowblower.
  • Adjust the chute angle by loosening the wing knob on the left side of the chute assembly and pivoting the chute upward or downward.

Setting Up⁚

  • Make sure the entire bottom surface of the skid shoe is against the ground to avoid uneven wear.
  • Familiarize yourself with the controls and features of your snowblower, including the throttle control, drive control, auger control, and choke control.
  • Ensure the fuel tank is filled with the recommended gasoline and the oil level is checked and topped off.

Operating Instructions

This section outlines the proper operation of your Craftsman 24-inch snowblower, ensuring safe and efficient snow removal. Follow these instructions carefully to maximize performance and avoid potential hazards.

Starting the Engine⁚

  • Move the throttle control to the FAST (rabbit) position.
  • If the engine is cold, place the choke in the CHOKE position. If the engine is warm, place the choke in the RUN position.
  • Push the primer three times, ensuring the vent hole in the carburetor is covered.
  • Pull the recoil starter cord firmly, ensuring the engine starts smoothly.
  • Once the engine is running, move the choke to the RUN position gradually.

Engaging Drive and Auger⁚

  • Move the shift lever into one of the six forward (F) positions or two reverse (R) positions, selecting a speed appropriate for snow conditions.
  • Squeeze the auger control grip against the handle to engage the auger and start snow-throwing action. Release to stop.

Operating Tips⁚

  • Adjust the chute angle to direct the snow to the desired location.
  • Avoid operating the snowblower on steep slopes or in areas with hidden hazards.
  • Always use extreme caution when handling gasoline, ensuring the area is well-ventilated and free of flames or sparks.
  • Never use your hands to clear a clogged chute assembly. Shut off the engine and use the clean-out tool to clear any obstructions.

Remember to always follow the safety precautions outlined in the manual to ensure a safe and enjoyable snow-clearing experience.

Maintenance Schedule

Regular maintenance is essential to ensure your Craftsman 24-inch snowblower operates efficiently and safely throughout the winter season. This schedule outlines key maintenance tasks and their recommended frequencies. Always follow the safety precautions outlined in the manual before performing any maintenance work.

Before each use⁚

  • Check the engine oil level and add oil as needed.
  • Inspect the spark plug for wear or damage and replace as necessary.
  • Clean the air filter to ensure proper engine performance.
  • Inspect the drive belt for wear and damage and replace if needed.
  • Ensure all nuts, bolts, and screws are securely tightened.

After each use⁚

  • Clean the snowblower thoroughly, removing any snow, ice, or debris.
  • Check for any damage to the auger, chute, or other components and repair or replace as necessary.
  • Lubricate the auger gear shaft, drive shaft, and other moving parts.
  • Store the snowblower in a dry and well-ventilated area.

Seasonal maintenance⁚

  • Inspect the fuel lines and carburetor for leaks or damage and repair or replace as needed.
  • Change the engine oil and filter.
  • Inspect the spark plug wire for cracks or damage and replace if necessary.
  • Check the battery terminals for corrosion and clean as needed.

By adhering to this maintenance schedule, you can ensure your snowblower remains in optimal condition, ready to handle any winter weather.

Troubleshooting and Repairs

While your Craftsman 24-inch snowblower is designed for durability, issues can arise. This section will guide you through common troubleshooting steps and basic repairs. Refer to the parts list and diagrams for component identification.

Engine won’t start⁚

  • Check the fuel level and ensure the fuel is fresh and clean.
  • Verify the spark plug is properly connected and in good condition.
  • Inspect the air filter and clean or replace it if necessary.
  • Ensure the choke is engaged for cold starts.

Engine runs poorly⁚

  • Clean the carburetor, ensuring all jets are clear.
  • Check the fuel lines and carburetor for leaks and replace if necessary.
  • Verify the air filter is clean and unobstructed.
  • Inspect the spark plug and replace if worn or damaged.

Auger doesn’t turn⁚

  • Check the drive belt for wear or damage and replace if necessary.
  • Ensure the auger control is properly engaged.
  • Inspect the auger gear shaft for damage and replace if necessary.

Chute won’t adjust⁚

  • Ensure the chute directional control is not frozen or jammed.
  • Lubricate the chute directional control mechanism.
  • Inspect the chute control cable for damage and replace if necessary.

For more complex repairs, consult a qualified technician or refer to the repair manual for your specific snowblower model.

Storage and Winterization

Proper storage and winterization are crucial for extending the life of your Craftsman 24-inch snowblower. By following these steps, you’ll ensure your machine is ready for the next snowy season.

Before Storage⁚

  • Thoroughly clean the snowblower, removing any accumulated snow, ice, or debris.
  • Inspect the exterior for any damage and repair as needed.
  • Change the engine oil and filter.
  • Clean or replace the air filter.
  • Inspect the spark plug and replace if necessary.
  • Lubricate the auger gearbox and other moving parts.

Winterization⁚

  • Drain the fuel tank to prevent fuel from degrading and clogging the carburetor.
  • Run the engine until it uses all the remaining fuel.
  • Add a fuel stabilizer to the fuel tank to prevent gumming and varnish formation.
  • Store the snowblower in a dry, well-ventilated area, preferably off the ground.
  • Cover the snowblower with a dust cover to protect it from dust and moisture.

By following these steps, you can ensure your Craftsman 24-inch snowblower remains in top condition and ready for action when the next winter arrives.

Parts List and Diagrams

The Parts List and Diagrams section of your Craftsman 24-inch snowblower manual is an invaluable resource for identifying, ordering, and replacing parts. It provides a detailed breakdown of each component, along with illustrations and descriptions.

Parts List⁚

  • The parts list typically includes a comprehensive inventory of all components, from the engine and transmission to the auger and chute assembly.
  • Each part is assigned a unique identification number, making it easy to reference and order.
  • The list may also include specifications for each part, such as dimensions, materials, and compatibility.

Diagrams⁚

  • The diagrams provide a visual representation of the snowblower’s components, making it easier to understand how they are assembled and connected;
  • The diagrams often use different colors and labels to highlight specific parts.
  • They also help you identify the location of each component, making it easier to locate and replace it.

By utilizing the Parts List and Diagrams, you can easily find the parts you need to maintain and repair your Craftsman 24-inch snowblower. Remember to always refer to your specific model’s manual for the most accurate information.

Warranty Information

The Warranty Information section of your Craftsman 24-inch snowblower manual outlines the terms and conditions of the manufacturer’s warranty. This section is crucial for understanding your rights and responsibilities as a consumer.

Warranty Coverage⁚

  • The warranty typically covers defects in materials and workmanship for a specific period, usually one to two years.
  • It may also cover specific components, such as the engine or transmission, for a longer duration.
  • The warranty might not cover damage caused by misuse, negligence, or improper maintenance.

Warranty Exclusions⁚

  • The warranty typically excludes damage caused by accidents, natural disasters, or unauthorized repairs.
  • It may also exclude wear and tear on parts that are subject to normal use.
  • Commercial or rental use may void the warranty or limit its coverage.

Warranty Claims⁚

  • The manual will provide instructions on how to file a warranty claim, including the required documentation and contact information.
  • You may need to provide proof of purchase and a description of the problem.
  • The manufacturer may offer repair, replacement, or a refund depending on the nature of the defect and the warranty terms.

It’s essential to carefully review the Warranty Information section of your Craftsman 24-inch snowblower manual to understand your rights and obligations.

Bykyler

owner manual 2007 ford f150 od light flashing trans fault

Understanding the Ford F-150 Overdrive Light Flashing

The flashing overdrive light on your 2007 Ford F-150 is a warning sign that your transmission is experiencing a fault. This can be caused by a variety of issues, including a faulty range or speed sensor, a defective solenoid, or even low transmission fluid. Understanding the causes and symptoms of this issue is crucial for addressing it effectively.

Transmission Fault Indication

The flashing overdrive (O/D) light on your 2007 Ford F-150 serves as a direct indicator of a transmission fault. This alert is not merely a nuisance; it signifies a serious issue that demands immediate attention. The flashing O/D light often accompanies a “Trans Fault” message on your dashboard’s LCD display, further emphasizing the need for prompt action. While the specific cause of the fault might remain unclear initially, the flashing O/D light serves as a clear signal that your transmission is not operating correctly. Ignoring this warning could lead to further damage and potentially costly repairs, so it’s essential to address the issue promptly.

Possible Causes

The flashing overdrive light on your 2007 Ford F-150 can be triggered by a variety of issues related to your transmission. One common culprit is a faulty range or speed sensor. These sensors play a crucial role in informing your transmission when to shift gears, and a malfunction can lead to incorrect shifting patterns or even complete transmission failure. Another potential cause is a defective solenoid. Solenoids control fluid flow within your transmission, and a faulty solenoid can disrupt the hydraulic pressure needed for smooth gear changes. Low transmission fluid levels can also contribute to the flashing O/D light, as insufficient fluid can lead to overheating and damage. Additionally, electrical problems within the transmission control system, such as loose wires or faulty connectors, can cause the O/D light to flash. The issue might even stem from internal damage to the transmission itself, requiring a more extensive repair.

Diagnosing the Fault

Diagnosing the cause of the flashing overdrive light on your 2007 Ford F-150 requires a systematic approach. The first step is to check the transmission fluid level. If it is low, adding more fluid may resolve the issue. If the fluid level is adequate, you can use an OBD-II diagnostic tool to read any stored trouble codes. These codes can provide valuable clues about the specific component that is malfunctioning. For example, a code related to a pressure control solenoid would indicate a problem with fluid pressure regulation. If you are comfortable with basic automotive repairs, you can inspect the transmission range sensor and shift solenoids for any visible damage or loose connections. However, if you are not mechanically inclined, it is advisable to take your vehicle to a qualified mechanic for a thorough diagnosis. They have the necessary tools and expertise to identify the root cause of the problem and recommend the most appropriate repair solution.

Common Symptoms

The flashing overdrive light on your 2007 Ford F-150 is often accompanied by a “Trans Fault” message on the dashboard display. This indicates a transmission problem that requires attention. You may also notice other symptoms, such as rough shifting, slipping gears, delayed engagement, or a loud clunking noise when shifting. The truck may struggle to accelerate or maintain speed, especially under load. In some cases, the transmission may even lock up completely, preventing the vehicle from moving. These symptoms can vary in severity depending on the underlying cause of the transmission fault. If you experience any of these symptoms along with the flashing overdrive light, it is important to address the issue promptly to prevent further damage to your transmission.

Troubleshooting Steps

Before taking your 2007 Ford F-150 to a mechanic, you can try some basic troubleshooting steps. First, check the transmission fluid level. If it’s low, add more fluid of the correct type. Next, inspect the transmission system for any loose wires or connections. If you find any, secure them properly. If you suspect a faulty transmission range sensor, check for any signs of damage or wear on the sensor. If you have an OBD-II diagnostic tool, you can use it to read any stored fault codes that might provide clues about the problem. These steps can help you pinpoint the issue or at least narrow down the potential causes. However, if you’re not comfortable working on your vehicle’s transmission, it’s best to seek professional assistance to avoid further damage.

Professional Assistance

If your 2007 Ford F-150’s overdrive light is flashing and you’ve exhausted basic troubleshooting steps, it’s time to seek professional help. A qualified mechanic or Ford dealership technician can diagnose the problem accurately. They have access to specialized equipment and diagnostic tools to pinpoint the cause of the fault. This could involve inspecting the transmission range sensor, solenoids, wiring, and other components. The mechanic will be able to perform a thorough inspection and recommend the appropriate repairs. They can also provide information on potential transmission problems that might be related to the flashing overdrive light, such as planetary gear failure or fluid leakage. By seeking professional assistance, you can ensure that the issue is addressed properly and prevent further damage to your transmission.

Cost of Repairs

The cost of repairing a flashing overdrive light on a 2007 Ford F-150 can vary greatly depending on the underlying cause. If the issue is a simple sensor replacement, you might expect to pay around $500, including parts and labor. However, if the problem involves a faulty solenoid or more complex transmission issues, the cost could easily exceed $1,000. In some cases, a complete transmission rebuild might be necessary, which can be a very expensive undertaking. It’s crucial to get a detailed estimate from the mechanic before proceeding with any repairs. They should break down the costs for parts, labor, and any additional services. Remember, it’s always better to address the problem promptly to prevent further damage and potentially higher repair costs in the long run.

Preventing Future Issues

While a flashing overdrive light can be a frustrating problem, there are steps you can take to help prevent future issues with your 2007 Ford F-150’s transmission. Regularly checking and maintaining your transmission fluid is crucial. Low fluid levels can cause overheating and damage to internal components. Always use the recommended type of transmission fluid for your vehicle. Furthermore, avoid harsh driving habits like sudden acceleration and braking. These actions can put undue stress on the transmission. If you frequently tow heavy loads, make sure to have your transmission serviced more often to ensure its longevity. Regular maintenance, including oil changes and filter replacements, can also contribute to overall transmission health. By following these preventive measures, you can extend the life of your transmission and minimize the chances of encountering a flashing overdrive light again.

Safety Considerations

A flashing overdrive light on your 2007 Ford F-150 indicates a transmission issue, which can potentially impact your driving experience and safety. The vehicle may struggle to accelerate or shift properly, making it difficult to maintain control, especially in demanding situations like merging onto a highway or navigating busy traffic. It’s crucial to avoid driving the vehicle for extended periods with a flashing overdrive light. Not only can it worsen the transmission problem, but it can also pose a risk to yourself and others on the road. If you encounter this issue, it’s recommended to pull over safely and contact a qualified mechanic for diagnosis and repair. Driving with a faulty transmission can lead to further damage and potentially dangerous situations, so prioritize safety and seek professional assistance as soon as possible.

Additional Information

Understanding the specific codes generated by your 2007 Ford F-150’s transmission can help you pinpoint the root of the problem.

Recalls and Safety Alerts

It’s essential to check for any outstanding recalls or safety alerts related to your 2007 Ford F-150’s transmission. The National Highway Traffic Safety Administration (NHTSA) website is a valuable resource for this information. You can search by vehicle year, make, and model to find any recalls or safety alerts related to your truck.

For example, there have been reports of transmission range sensor failures in certain 2007 Ford F-150 models. These failures can cause the overdrive light to flash and lead to transmission problems. Ford issued a recall for these vehicles, and it’s crucial to ensure your truck has been repaired if it’s affected by this recall.

Checking for recalls and safety alerts is a proactive step to ensure the safety and reliability of your vehicle.

Transmission Fluid Level

Low transmission fluid is a common culprit for a flashing overdrive light in the 2007 Ford F-150. The transmission fluid lubricates and cools the internal components, and a shortage can lead to overheating, slipping, and other issues. The fluid level should be checked regularly, especially if you frequently tow heavy loads or drive in hot conditions.

To check the fluid level, locate the transmission dipstick, typically found near the back of the engine. Ensure the engine is running and the vehicle is level. Pull the dipstick out, wipe it clean, and reinsert it fully. Remove the dipstick again and check the fluid level. It should be within the “Full” range on the dipstick.

If the level is low, add the correct type of transmission fluid. Consult your owner’s manual for the recommended fluid type for your 2007 F-150. Never overfill the transmission, as this can cause just as many problems as a low level.

Transmission Range Sensor

The transmission range sensor (TRS) is a crucial component that tells the transmission control module (TCM) which gear the transmission is in. A faulty TRS can cause the overdrive light to flash, as the TCM may receive incorrect signals about the transmission’s position. This can lead to shifting problems, including slipping, rough shifting, or the inability to shift into overdrive.

Symptoms of a faulty TRS can include a flashing overdrive light, a “Trans Fault” message on the dash, or a transmission that feels like it’s slipping. The TRS is typically located on the transmission itself and can be accessed by removing the transmission pan.

If you suspect a faulty TRS, it’s essential to have it diagnosed by a qualified mechanic. They can use a diagnostic scanner to check for trouble codes related to the TRS and determine if it needs to be replaced. Replacing the TRS is a relatively straightforward repair but may require specialized tools and knowledge.

Shift Solenoid Pack

The shift solenoid pack is a critical component within the transmission that controls the flow of hydraulic fluid to the clutch packs, which are responsible for engaging and disengaging the gears. A malfunctioning shift solenoid pack can cause a variety of transmission issues, including a flashing overdrive light, rough shifting, slipping, or even complete transmission failure.

Symptoms of a faulty shift solenoid pack can include a delayed or rough shift into overdrive, slipping when accelerating, or a “Trans Fault” message on the dashboard. In some cases, the transmission may even lock up entirely, preventing the vehicle from moving. The shift solenoid pack is located inside the transmission and can be accessed by removing the transmission pan.

Diagnosing a faulty shift solenoid pack usually involves using a diagnostic scanner to check for trouble codes related to the solenoids. A qualified mechanic will need to inspect the solenoids for signs of damage or wear. Replacing the shift solenoid pack can be a complex repair, requiring specialized tools and knowledge of the transmission system. It’s important to seek professional help for this repair to ensure that the transmission is properly diagnosed and repaired.

Pressure Control Solenoid

The pressure control solenoid (PCS) plays a crucial role in regulating the hydraulic pressure within your Ford F-150’s transmission, ensuring smooth gear changes. This solenoid is responsible for directing the flow of hydraulic fluid to different parts of the transmission based on the driving conditions and the selected gear.

When the PCS malfunctions, it can lead to a variety of transmission issues, including the flashing overdrive light. A faulty PCS can cause problems with shifting, including slipping, delayed engagement, or rough shifts. It can also contribute to a loss of power or a “Trans Fault” message on the dashboard.

Diagnosing a faulty PCS often involves using a diagnostic scanner to retrieve trouble codes related to the solenoid. A mechanic will inspect the PCS for signs of damage, wear, or blockage. Replacing the PCS is a relatively straightforward repair for a qualified mechanic. However, it’s crucial to ensure the correct part is used and that the installation is performed correctly to avoid further transmission problems.

Bykyler

fissler pressure cooker manual

Fissler pressure cookers are known for their quality and durability‚ making them a popular choice for home cooks. The Fissler Vitaquick Premium Pressure Cooker is a great example of their commitment to providing high-quality products. The manual accompanying this pressure cooker contains crucial information about its features‚ safety instructions‚ cleaning‚ cooking levels‚ troubleshooting tips‚ and where to find additional resources. This manual is essential for ensuring proper use‚ maximizing your cooking experience‚ and maintaining your pressure cooker for years to come.

Introduction

Welcome to the world of fast and healthy cooking with the Fissler Vitaquick Premium Pressure Cooker! This comprehensive manual is your guide to unlocking the full potential of your new pressure cooker. From understanding the basics of pressure cooking to mastering its advanced features‚ this manual will equip you with the knowledge and confidence to create delicious meals in a fraction of the time. Fissler pressure cookers are renowned for their quality‚ durability‚ and innovative design. The Vitaquick model incorporates cutting-edge technology and features‚ offering a user-friendly experience that makes pressure cooking a breeze. Whether you’re a seasoned chef or a culinary novice‚ this manual will serve as your trusted companion‚ helping you navigate every aspect of using your Fissler Vitaquick Pressure Cooker. Get ready to embark on a culinary adventure filled with flavor‚ convenience‚ and the satisfaction of creating nutritious meals for your family and friends. Let’s dive into the exciting world of pressure cooking with Fissler!

Understanding Pressure Cooking

Pressure cooking is a revolutionary method that transforms the way we cook. It harnesses the power of steam to create a sealed environment within the pressure cooker‚ significantly increasing the cooking temperature and reducing cooking time. This method is ideal for tenderizing tough cuts of meat‚ softening vegetables‚ and preparing hearty meals quickly. The magic lies in the pressure build-up within the cooker. As steam accumulates‚ it increases the pressure‚ raising the boiling point of water. This allows food to cook at a higher temperature‚ resulting in faster cooking times and a more tender texture. Pressure cooking isn’t just about speed; it also preserves nutrients and flavors. The sealed environment prevents the escape of steam‚ locking in moisture and preserving the natural flavors of your ingredients. This makes it a healthy and delicious way to cook. From simmering stews to whipping up flavorful curries‚ the possibilities are endless with pressure cooking. This manual will guide you through the fundamentals of pressure cooking‚ explaining the science behind it and equipping you with the knowledge to confidently explore this exciting culinary technique.

Fissler Vitaquick Premium Pressure Cooker

The Fissler Vitaquick Premium Pressure Cooker stands out as a testament to Fissler’s dedication to quality and innovation. This pressure cooker isn’t just a kitchen appliance; it’s a culinary companion designed to elevate your cooking experience. Crafted with high-quality materials and meticulous attention to detail‚ the Vitaquick embodies Fissler’s commitment to durability and performance. It boasts a sleek and modern design‚ making it an attractive addition to any kitchen. But the Vitaquick is more than just good looks. It’s engineered with advanced features that make pressure cooking a breeze. The user-friendly interface‚ intuitive controls‚ and multiple pressure settings offer a wide range of cooking options. From delicate vegetables to hearty meats‚ the Vitaquick allows you to cook a variety of dishes with precision and ease. The Vitaquick’s safety features are equally impressive. It incorporates multiple safety mechanisms to ensure peace of mind during use. These features include pressure release valves‚ safety locks‚ and a secure lid design. The Fissler Vitaquick Premium Pressure Cooker is a powerful tool for any home cook. It’s a testament to Fissler’s commitment to quality‚ functionality‚ and safety‚ making it a reliable and efficient addition to your kitchen arsenal.

Fissler Pressure Cooker Manual Features

The Fissler Pressure Cooker Manual is more than just a collection of instructions; it’s a comprehensive guide to unlocking the full potential of your pressure cooker. Packed with valuable information and detailed explanations‚ this manual empowers you to navigate the world of pressure cooking with confidence. The manual begins by providing a thorough introduction to pressure cooking‚ explaining the science behind this efficient cooking method and its benefits. It then delves into the specific features of your Fissler pressure cooker‚ providing a detailed overview of its design‚ components‚ and functionality. The manual includes clear and concise instructions for using each feature‚ from setting the pressure levels to understanding the various safety mechanisms. It also offers helpful tips and tricks to enhance your cooking experience‚ ensuring you achieve optimal results every time. A dedicated section on cleaning and maintenance is essential for preserving your pressure cooker’s longevity and ensuring its continued performance; The manual provides step-by-step instructions for cleaning and caring for your pressure cooker‚ ensuring it remains in top condition. Finally‚ the Fissler Pressure Cooker Manual includes a comprehensive troubleshooting section‚ addressing common issues and providing solutions for any problems you may encounter. This section ensures you have the necessary information to resolve any difficulties and continue your cooking journey with ease. The Fissler Pressure Cooker Manual is your ultimate companion for mastering pressure cooking.

Safety Instructions

Safety is paramount when using any pressure cooker‚ and the Fissler Vitaquick Premium Pressure Cooker manual emphasizes this with a dedicated section on safety instructions. The manual begins by highlighting the importance of reading and understanding all safety instructions before operating the pressure cooker. It then delves into specific safety measures‚ outlining the proper handling of the pressure cooker‚ including how to safely lock and unlock the lid‚ release steam pressure‚ and avoid potential hazards. A crucial aspect of pressure cooker safety involves the proper use of the pressure release valve. The manual provides detailed instructions on how to use the valve effectively‚ ensuring safe and controlled pressure release during and after cooking. The manual also emphasizes the importance of using only original Fissler replacement parts‚ ensuring compatibility and maintaining the pressure cooker’s functionality and safety. Additional safety tips include avoiding overfilling the pressure cooker‚ never using it on a stovetop with a damaged or cracked base‚ and always ensuring the pressure cooker is placed on a stable and heat-resistant surface. Furthermore‚ the manual advises against leaving the pressure cooker unattended while it’s in operation and emphasizes the importance of regular cleaning and maintenance to prevent potential safety hazards. The Fissler Pressure Cooker Manual’s safety instructions are designed to ensure your safety and provide peace of mind while you enjoy the benefits of pressure cooking.

Cleaning and Maintenance

The Fissler Vitaquick Premium Pressure Cooker manual provides comprehensive instructions on cleaning and maintaining your pressure cooker to ensure its longevity and optimal performance. The manual recommends handwashing the pressure cooker‚ emphasizing the importance of avoiding harsh abrasives or scouring pads that could damage the surface. The manual suggests using a mild dish soap and warm water to clean the pressure cooker‚ emphasizing the need to thoroughly rinse it after cleaning. The manual also provides specific instructions for cleaning different parts of the pressure cooker‚ including the inner pot‚ lid‚ and sealing ring. For the inner pot‚ the manual advises against using abrasive cleaners‚ recommending handwashing with a mild detergent and warm water. The lid‚ which houses the pressure release valve‚ should also be handwashed with a mild detergent‚ while the sealing ring requires careful cleaning to maintain its effectiveness. The manual instructs you to remove the sealing ring from the lid and clean it thoroughly with a soft brush and warm water. The manual also emphasizes the importance of drying all parts of the pressure cooker completely after cleaning to prevent water damage and potential rusting. Furthermore‚ the manual stresses the importance of regular maintenance‚ recommending periodic inspection of the sealing ring and the pressure release valve for any signs of wear and tear. By following these cleaning and maintenance instructions‚ you can ensure that your Fissler Vitaquick Premium Pressure Cooker remains in top condition‚ providing you with safe and efficient cooking for many years to come.

Cooking Levels and Settings

The Fissler Vitaquick Premium Pressure Cooker manual provides a detailed explanation of the different cooking levels and settings available on the appliance. It emphasizes that the pressure cooker features multiple cooking levels‚ each designed for specific types of food and cooking techniques. The manual explains that the gentle level (cooking level 1) is ideal for delicate foods like fish and leafy vegetables‚ offering a lower temperature of approximately 230°F. Cooking level 2‚ with a slightly higher temperature of approximately 235°F‚ is recommended for cooking vegetables. The manual also provides a detailed description of other cooking levels and their corresponding temperatures‚ enabling users to select the optimal setting for their desired cooking outcome. The manual further explains how to adjust the cooking time based on the chosen cooking level and the type of food being prepared. It highlights the importance of understanding the relationship between cooking level‚ temperature‚ and cooking time for achieving the best results. Additionally‚ the manual provides guidance on using the pressure release valve‚ explaining how to safely release pressure after cooking. It clarifies the difference between quick pressure release and natural pressure release‚ explaining the advantages and disadvantages of each method. By providing a comprehensive guide to cooking levels‚ settings‚ and pressure release techniques‚ the Fissler Vitaquick Premium Pressure Cooker manual empowers users to utilize the appliance effectively and achieve consistently delicious results.

Troubleshooting and FAQ

The Fissler Vitaquick Pressure Cooker manual includes a comprehensive troubleshooting section‚ addressing common issues users may encounter. It covers a range of problems‚ from difficulties with pressure build-up to unexpected noises during operation. The manual systematically guides users through potential causes and provides solutions for each issue. For instance‚ it explains that if the pressure cooker isn’t building pressure properly‚ it might be due to a faulty valve or a blockage in the steam vent. It provides step-by-step instructions on how to check and clean these components. The manual also addresses issues related to pressure release‚ explaining how to safely release steam and prevent accidental burns. In addition to troubleshooting tips‚ the manual includes a frequently asked questions (FAQ) section‚ addressing common user queries. These questions range from how to properly clean the pressure cooker to understanding the different cooking levels and their applications. The FAQ section provides concise answers to frequently asked questions‚ ensuring users have readily accessible information to address their concerns. The manual’s troubleshooting and FAQ sections are designed to provide users with the necessary knowledge and guidance to resolve common issues and enhance their overall experience with the Fissler Vitaquick Pressure Cooker. By addressing potential problems and clarifying frequently asked questions‚ the manual empowers users to troubleshoot issues independently and confidently‚ making cooking with the pressure cooker a seamless and enjoyable experience.

Where to Find the Manual

If you’re missing your Fissler Vitaquick Pressure Cooker manual‚ or simply need a digital copy for easy access‚ you have several options. Fissler provides a comprehensive online resource where you can download the manual in PDF format. This allows you to conveniently access the information on your computer‚ tablet‚ or smartphone. The manual is readily available on Fissler’s website‚ and you can easily locate it by searching for “Fissler Vitaquick Pressure Cooker Manual”. Alternatively‚ you can contact Fissler’s customer service directly. They can provide you with a digital copy of the manual or assist you in obtaining a printed version if needed. Fissler values customer satisfaction and is committed to providing support and resources to ensure a smooth and enjoyable cooking experience with their products. Additionally‚ you can find the manual on various online platforms that specialize in appliance manuals. These websites often have a database of manuals for a wide range of products‚ including Fissler’s pressure cookers. You can easily search for “Fissler Vitaquick Pressure Cooker Manual” on these platforms and access the document for free. Regardless of your preferred method‚ finding the Fissler Vitaquick Pressure Cooker manual is a straightforward process. You can access the information online‚ request a digital copy from Fissler directly‚ or browse online platforms for a digital version. Having the manual readily available ensures you have the necessary information to utilize your pressure cooker safely and effectively‚ enhancing your culinary adventures.

Bykyler

odyssey 1000 garage door opener manual

Overhead Door Odyssey 1000 Garage Door Opener Manual

This manual provides comprehensive instructions for the Overhead Door Odyssey 1000 garage door opener, covering features, installation, programming, troubleshooting, safety, maintenance, remote control, and more. It’s a valuable resource for homeowners and installers alike, ensuring a smooth and safe operation of your garage door.

Overview

The Overhead Door Odyssey 1000 Garage Door Opener Manual is your comprehensive guide to understanding, installing, and maintaining your garage door opener. This manual covers a wide range of topics, from basic features and installation to advanced troubleshooting and programming. Whether you’re a seasoned homeowner or a first-time installer, this manual provides the essential information you need for a smooth and safe operation of your Odyssey 1000 garage door opener.

The manual is designed to be user-friendly, with clear instructions, diagrams, and illustrations to guide you through every step. It also includes detailed troubleshooting tips to help you address any issues you might encounter with your opener. With its comprehensive coverage and easy-to-follow format, the Overhead Door Odyssey 1000 Garage Door Opener Manual is an invaluable resource for anyone who wants to get the most out of their garage door opener.

The manual is available for free download in PDF format, making it easily accessible from your computer or mobile device. It’s a valuable resource to keep handy for future reference, ensuring you have the information you need whenever you need it.

Features

The Overhead Door Odyssey 1000 garage door opener boasts a range of features designed for convenience, security, and reliability. Here’s a rundown of its key highlights⁚

  • Door Detect Monitoring and Diagnostic Technology⁚ This innovative feature precisely senses the force required at every movement of the door, ensuring smooth and efficient operation even for heavier doors.
  • 315 or 390 MHz Frequency Operation⁚ The opener listens for both frequencies emitted by the remote or wireless keypad, ensuring reliable operation and minimizing interference.
  • LED Indicators⁚ The Odyssey 1000 features LED indicators that provide visual feedback on the opener’s status and any potential errors. These lights can help you quickly diagnose and address issues, making troubleshooting a breeze.
  • Compatibility with Remootio Wi-Fi and Bluetooth⁚ The Odyssey 1000 is compatible with the Remootio smart gate opener accessory, allowing you to control your garage door opener with your smartphone via Wi-Fi or Bluetooth, adding a layer of convenience and control.

These features combine to deliver a garage door opener that is not only powerful and reliable but also user-friendly and technologically advanced. The Odyssey 1000 offers a blend of functionality and convenience, making it a top choice for homeowners seeking a secure and efficient garage door solution.

Installation

Installing the Overhead Door Odyssey 1000 garage door opener is a straightforward process, but it’s crucial to follow the instructions carefully for safe and proper operation. Here’s a general overview of the installation steps, though specific details may vary depending on your garage’s setup⁚

  1. Prepare the Garage⁚ Clear the area around the garage door opening, ensuring there’s enough space to work comfortably. Disconnect the power supply to the garage door opener.
  2. Mount the Opener⁚ Attach the opener to the ceiling using the provided hardware. Ensure the opener is securely mounted and level. Refer to the manual for specific mounting instructions.
  3. Connect the Rail⁚ Connect the rail system to the opener, extending it along the length of the garage door opening. The rail must be properly secured and aligned.
  4. Attach the Trolley⁚ Attach the trolley to the rail, ensuring it runs smoothly and without obstruction. The trolley holds the door and is responsible for opening and closing it.
  5. Install the Safety Sensors⁚ Place the safety sensors at the bottom of the garage door opening, ensuring they’re positioned correctly and unobstructed. These sensors prevent the door from closing if an object is in the way.
  6. Connect the Power⁚ Carefully reconnect the power supply to the opener, ensuring all connections are secure. Test the opener to ensure it is functioning properly.

While these steps provide a general outline, always consult the Odyssey 1000’s installation manual for detailed instructions specific to your model and situation. If you have any doubts or experience difficulties during installation, it’s best to seek assistance from a qualified professional.

Programming

Programming your Overhead Door Odyssey 1000 garage door opener involves configuring settings for proper operation and adding remote controls. The process is relatively straightforward, but it’s essential to follow the instructions carefully to ensure optimal performance and security. Here’s a general overview of the programming steps, but always refer to your specific Odyssey 1000 manual for detailed instructions⁚

  1. Locate the Programming Button⁚ The programming button is typically located on the opener’s control panel or the wall console.
  2. Enter Programming Mode⁚ Press and hold the programming button for a specified duration (usually several seconds) until the opener’s LED lights indicate programming mode. This may involve a specific sequence of button presses depending on your model.
  3. Program Remote Controls⁚ Press the button on the remote control you want to program while the opener is in programming mode. The opener will typically confirm the remote is programmed by flashing its lights or performing a specific action.
  4. Set Door Limits⁚ Program the opener to recognize the door’s open and closed positions. This usually involves using the opener’s controls to move the door to its open and closed positions while the opener is in programming mode.
  5. Configure Force Settings⁚ Adjust the opener’s force settings to ensure the door opens and closes smoothly and safely without excessive force. These settings may vary depending on the weight and balance of your door.
  6. Exit Programming Mode⁚ Once you’ve completed the desired programming steps, exit programming mode by pressing the programming button again. The opener should confirm that you’ve exited programming mode.

This guide provides a general outline, but it’s crucial to consult the Odyssey 1000’s programming instructions for specific details and any model-specific variations. If you encounter difficulties during programming, it’s advisable to seek assistance from a qualified professional.

Troubleshooting

While the Overhead Door Odyssey 1000 garage door opener is designed for reliable operation, occasional issues may arise. Troubleshooting these problems can often be done independently, but if you’re unsure or the issue persists, contact a qualified technician. Here are some common issues and potential solutions⁚

  • Door Won’t Open or Close⁚ Check the power supply to the opener. Ensure the circuit breaker hasn’t tripped; Examine the door for obstructions. Inspect the safety sensors to ensure they are aligned and not obstructed. If the door is off-track, carefully realign it.
  • Door Opens or Closes Slowly⁚ Assess the condition of the door’s springs and cables. They may need adjustment or replacement. Ensure the door is balanced correctly. If the opener’s motor is making unusual noises, it may indicate a motor issue requiring professional attention.
  • Remote Control Doesn’t Work⁚ Check the remote control’s battery. If it’s low, replace it. Ensure the remote is within range of the opener and that there are no obstructions blocking the signal. You may need to reprogram the remote if it has lost its connection to the opener.
  • LED Lights Flashing⁚ LED lights flashing on the opener typically indicate an error code. Refer to your Odyssey 1000 manual to decipher the specific flashing pattern and the corresponding issue. This can range from a safety sensor problem to a motor overload.
  • Loud Noises During Operation⁚ If the opener makes unusual noises, such as grinding or screeching, this could signal a problem with the motor, gears, or other mechanical components. It’s best to have a professional inspect the opener to diagnose and address the issue.

These troubleshooting tips provide a starting point, but always consult your Odyssey 1000 manual for detailed troubleshooting guides specific to your model. If you’re unable to resolve the issue yourself, don’t hesitate to seek professional assistance.

Safety Features

The Overhead Door Odyssey 1000 garage door opener prioritizes safety, incorporating several features to protect you and your family. These features ensure smooth and secure operation, minimizing potential hazards associated with garage doors.

  • Safety Sensors⁚ The Odyssey 1000 comes equipped with photoelectric safety sensors, often called “eye beams,” located near the bottom of the door. These sensors emit and receive infrared beams, creating an invisible safety barrier. If anything, even a small object, breaks the beam during the door’s closing cycle, the door will immediately reverse its direction, preventing potential injuries or damage.
  • Force Limiting Technology⁚ The opener utilizes a force-limiting system that monitors the door’s movement. If the door encounters an obstruction or excessive resistance, the system will automatically reverse the door’s motion, preventing potential damage or injuries. This feature helps to prevent the door from crushing objects or people.
  • Door Detect Technology⁚ The Odyssey 1000 incorporates Door Detect technology, which monitors the door’s movement and detects potential issues, such as obstructions or misalignment. If the opener senses a problem, it may alert you with warning lights or sounds, prompting you to investigate and address the situation.
  • Manual Release⁚ In the event of a power outage or mechanical failure, the opener has a manual release mechanism. This allows you to manually disconnect the opener from the door, enabling you to open and close the door manually. This feature ensures access to your garage, even if the opener is not operational.
  • Automatic Reverse⁚ The Odyssey 1000 features an automatic reverse system. If the door encounters an obstruction during its closing cycle, the opener automatically reverses the door’s motion, preventing potential damage or injuries. This feature enhances safety by ensuring that the door does not come to a complete stop on an object.

These safety features work together to create a secure and protected environment for your garage and family. Always review the manual for specific instructions on testing and maintaining these features.

Maintenance

Regular maintenance is crucial for keeping your Overhead Door Odyssey 1000 garage door opener operating smoothly and safely. Following these steps will help extend the life of your opener and prevent potential issues⁚

  • Clean the Tracks⁚ Dust, dirt, and debris can accumulate in the door’s tracks, hindering smooth operation and potentially causing damage. Use a soft brush or vacuum cleaner to remove any accumulated dirt. If necessary, use a damp cloth to wipe the tracks clean, ensuring they are completely dry before operating the door.
  • Lubricate Moving Parts⁚ Apply a light lubricant to the moving parts of the opener, such as the chain, rollers, and hinges. Use a silicone-based spray lubricant, avoiding oil-based products that can attract dirt and grime. Lubrication ensures smooth movement and reduces friction, preventing premature wear and tear.
  • Inspect Safety Sensors⁚ Regularly inspect the safety sensors (eye beams) for any damage, misalignment, or obstructions. Ensure the sensors are clean and unobstructed for proper operation. If you notice any issues, consult the manual or contact a qualified technician for assistance.
  • Check the Springs⁚ Garage door springs are under significant tension, and over time, they can lose their strength or become damaged. Inspect the springs for any signs of wear or damage. If you notice any issues, contact a qualified technician for professional inspection and replacement.
  • Test the Opener⁚ Periodically test the opener’s functionality by operating the door several times. Listen for any unusual noises, such as grinding, screeching, or rattling. Check that the door opens and closes smoothly and that the safety sensors are functioning correctly.
  • Inspect the Remote Controls⁚ Check the remote controls for any signs of damage or malfunction. Ensure the batteries are fresh and that the remote control buttons are responsive. If you experience issues, consult the manual or contact Overhead Door for assistance.

By following these simple maintenance steps, you can ensure your Odyssey 1000 opener operates reliably and safely for years to come. For more detailed information on specific maintenance procedures, consult the user manual or contact an authorized Overhead Door dealer.

Remote Control

The Overhead Door Odyssey 1000 garage door opener comes equipped with a remote control that provides convenient and secure access to your garage. The remote control uses radio frequency technology to communicate with the opener, allowing you to open and close your door from a distance. Here’s a breakdown of the remote control features and operation⁚

  • Programming⁚ The Odyssey 1000 remote control is designed for easy programming. The manual will provide detailed instructions on how to program the remote control to your specific opener. This typically involves pressing a specific button on the opener and the remote control simultaneously to establish a connection.
  • Range⁚ The remote control has a sufficient range to operate the garage door from a reasonable distance. However, the actual range can vary depending on factors such as obstacles, interference, and the condition of the remote control’s batteries.
  • Multiple Remote Controls⁚ The Odyssey 1000 opener can be programmed to work with multiple remote controls. This allows you to share access to the garage with family members or other authorized individuals.
  • Battery Replacement⁚ The remote control uses a standard battery type, easily replaceable. The manual will specify the type of battery required. When the battery starts to run low, you’ll notice a decrease in the remote control’s range and responsiveness. Replace the battery promptly to ensure reliable operation.
  • Security⁚ The Odyssey 1000 remote control uses rolling code technology to enhance security. This means that each time you press a button on the remote, it sends a unique code to the opener, preventing unauthorized access.

For any issues with your remote control, such as programming difficulties, reduced range, or malfunctioning buttons, consult the user manual or contact Overhead Door customer support for assistance. Proper remote control operation ensures convenient and secure access to your garage.

Wireless Connectivity

The Overhead Door Odyssey 1000 garage door opener offers advanced wireless connectivity features, allowing you to control your garage door from anywhere with a compatible smartphone or other smart devices. Here’s an overview of the wireless connectivity features and how to utilize them⁚

  • Wi-Fi Compatibility⁚ The Odyssey 1000 opener can be integrated with a compatible Wi-Fi bridge, allowing it to connect to your home’s wireless network. This enables you to control the garage door using a smartphone app, regardless of your location.
  • Smartphone App⁚ The Overhead Door app, available for iOS and Android devices, allows you to open and close your garage door, monitor its status, and set up various features remotely. This app provides a convenient way to manage your garage door from your smartphone, offering real-time control and visibility.
  • Remote Access⁚ With the Wi-Fi bridge and smartphone app, you can remotely access and control your garage door from anywhere with an internet connection. This provides peace of mind, allowing you to open or close your garage door for guests, deliveries, or other needs, even when you’re not home.
  • Smart Home Integration⁚ The Odyssey 1000 opener is compatible with popular smart home platforms such as Amazon Alexa and Google Assistant. This integration allows you to control your garage door using voice commands, enhancing the convenience and automation of your home.
  • Security⁚ The Odyssey 1000 opener utilizes encryption and password protection to secure wireless communication. This helps prevent unauthorized access and safeguards the security of your garage and its contents.

To take advantage of the Odyssey 1000’s wireless connectivity features, ensure you have a compatible Wi-Fi bridge and smartphone app. Follow the instructions in the user manual for setting up the wireless connection and configuring the app. The manual will also provide guidance on smart home integration and security features.

Bykyler

rbans scoring manual pdf

RBANS Scoring Manual PDF⁚ A Comprehensive Guide

The RBANS Scoring Manual PDF serves as an indispensable resource for professionals administering and interpreting the Repeatable Battery for the Assessment of Neuropsychological Status (RBANS). This comprehensive document provides detailed guidance on scoring, interpretation, and clinical application of the RBANS, a widely used neuropsychological test designed to evaluate cognitive functioning in adults; The manual is essential for ensuring accurate and reliable assessment of cognitive abilities, aiding in the diagnosis and management of neurological conditions, and supporting research endeavors.

Introduction

The Repeatable Battery for the Assessment of Neuropsychological Status (RBANS) stands as a prominent neuropsychological assessment tool, widely employed to evaluate cognitive functioning in adults. Its brevity and comprehensive nature, encompassing a range of cognitive domains, have contributed to its widespread adoption in clinical and research settings. The RBANS Scoring Manual PDF serves as the authoritative guide for professionals utilizing this instrument. This comprehensive document delves into the intricacies of scoring, interpretation, and clinical application of the RBANS, providing a foundational understanding of its purpose, structure, and administration. The manual’s significance lies in ensuring accurate and reliable assessment of cognitive abilities, aiding in the diagnosis and management of neurological conditions, and supporting research endeavors that seek to unravel the complexities of cognitive functioning in various populations.

The RBANS Scoring Manual PDF is not merely a technical guide; it acts as a bridge between the theoretical underpinnings of neuropsychological assessment and the practical application of the RBANS in real-world settings. It equips professionals with the knowledge and tools necessary to interpret test results, translate them into meaningful clinical insights, and make informed decisions regarding patient care. This introduction serves as a prelude to a more in-depth exploration of the RBANS Scoring Manual PDF, highlighting its key features, updates, and the valuable insights it offers for professionals navigating the field of neuropsychological assessment.

The RBANS⁚ A Brief Overview

The Repeatable Battery for the Assessment of Neuropsychological Status (RBANS), developed by Dr. Chris Randolph, is a widely recognized and extensively used neuropsychological assessment tool designed for evaluating cognitive functioning in adults. Its primary purpose is to provide a comprehensive yet concise evaluation of cognitive abilities, making it particularly valuable for individuals with suspected neurological deficits. The RBANS stands out for its brevity, typically requiring 25 minutes for administration, allowing for efficient assessments within busy clinical settings. The test encompasses a range of cognitive domains, including attention, language, visuospatial abilities, immediate and delayed memory, offering a multi-faceted view of cognitive strengths and weaknesses.

The RBANS is structured around twelve subtests, each targeting specific cognitive functions. These subtests are grouped into five index scores⁚ Immediate Memory, Visuospatial/Construction, Language, Attention, and Delayed Memory. These index scores provide a more nuanced picture of cognitive performance across different domains. The RBANS also includes a total score, offering a general measure of overall cognitive functioning. The test’s standardized administration and scoring procedures ensure consistency and reliability, making it a valuable tool for clinical decision-making and research purposes. This brief overview lays the groundwork for a deeper exploration of the RBANS Scoring Manual PDF, which provides detailed guidance on the nuances of administration, scoring, and interpretation of this widely-used neuropsychological instrument.

RBANS Scoring Manual⁚ Key Features

The RBANS Scoring Manual PDF is a comprehensive guide that provides detailed instructions and resources for accurately administering, scoring, and interpreting the Repeatable Battery for the Assessment of Neuropsychological Status (RBANS). This manual serves as an essential tool for professionals who utilize the RBANS in their clinical practice or research endeavors. The RBANS Scoring Manual is designed to ensure the consistent and reliable application of the RBANS, thereby enhancing the validity and accuracy of assessments. Key features of the manual include⁚

Detailed Scoring Instructions⁚ The manual provides step-by-step instructions for scoring each of the RBANS subtests, ensuring consistency and accuracy in assigning points. This clarity minimizes the risk of scoring errors and ensures reliable interpretation of results.
Normative Data and Tables⁚ The manual contains extensive normative data, including age-corrected scores for each subtest and index score. These tables allow for the comparison of an individual’s performance to a representative sample, facilitating meaningful interpretation of results.
Interpretation Guidelines⁚ The manual offers guidance on interpreting individual scores, taking into account age, education level, and other relevant factors. This assists clinicians in understanding the significance of scores and drawing appropriate clinical conclusions.
Clinical Applications and Research Uses⁚ The manual discusses various clinical applications of the RBANS, highlighting its utility in diagnosing and monitoring cognitive decline in various neurological conditions. It also outlines its value in research studies investigating cognitive functioning.
Updates and Enhancements⁚ The RBANS Scoring Manual PDF is periodically updated to incorporate new research findings, changes in scoring procedures, or revisions to normative data. This ensures that the manual remains current and relevant to the evolving field of neuropsychological assessment.

RBANS Scoring Manual⁚ Updates and Enhancements

The RBANS Scoring Manual PDF has undergone several updates and enhancements since its initial publication, reflecting the ongoing evolution of neuropsychological assessment and the growing body of research on the RBANS. These revisions aim to enhance the accuracy, comprehensiveness, and clinical utility of the manual, ensuring its continued relevance in contemporary practice. Key updates include⁚

Expanded Normative Data⁚ The manual has been updated to include expanded normative data, encompassing a broader age range and demographic representation. This increased sample size enhances the generalizability of the norms, making them more applicable to a wider range of individuals.
Revised Scoring Procedures⁚ The manual may incorporate revisions to scoring procedures, reflecting refinements in the understanding of cognitive processes or changes in recommended practices. These updates ensure that scoring is aligned with current best practices and scientific knowledge.
Inclusion of New Research Findings⁚ The manual incorporates new research findings related to the RBANS, including studies investigating its validity, reliability, and sensitivity to various neurological conditions. This integration of new knowledge enhances the manual’s clinical and research relevance.
Enhanced Interpretation Guidelines⁚ The manual may include expanded interpretation guidelines, providing clinicians with more detailed insights into the implications of specific scores and patterns of performance. This assists in making more nuanced and informed clinical judgments.
Clarification of Clinical Applications⁚ The manual may provide further clarification on the appropriate clinical applications of the RBANS, outlining its utility in specific diagnostic contexts and for monitoring cognitive changes over time.

RBANS Scoring⁚ Manual vs. Digital Options

The RBANS Scoring Manual PDF represents the traditional, paper-based approach to scoring this neuropsychological test. However, advancements in technology have introduced digital options for RBANS scoring, offering both advantages and disadvantages compared to the manual method.

Manual Scoring⁚ The traditional approach involves using the printed RBANS Scoring Manual and a pencil to manually calculate scores for each subtest and index. This method requires meticulous attention to detail and can be time-consuming, particularly when dealing with complex scoring procedures. However, it offers a degree of control and familiarity, as clinicians are accustomed to working with printed materials.

Digital Scoring⁚ Digital scoring platforms, such as Q-interactive, streamline the RBANS scoring process, automating calculations and reducing the risk of errors. These platforms often provide a user-friendly interface, allowing clinicians to input data and generate reports efficiently; However, reliance on digital tools necessitates access to technology and internet connectivity, which may not always be readily available. Additionally, some clinicians may prefer the tactile experience and the physical presence of the manual.

Ultimately, the choice between manual and digital scoring depends on individual preferences, resource availability, and specific clinical needs. Both options have their merits, and the best approach may vary depending on the context of assessment.

RBANS Scoring⁚ Interpretation and Clinical Significance

The RBANS Scoring Manual PDF provides invaluable guidance for interpreting the results of the RBANS and drawing meaningful clinical conclusions. Understanding the significance of scores is crucial for accurate diagnosis, treatment planning, and monitoring of neurocognitive functioning.

The manual outlines the normative data for each subtest and index score, allowing clinicians to compare an individual’s performance to a representative sample of the population. Scores significantly below the norm may indicate cognitive impairment, while scores within the normal range suggest intact cognitive functioning. However, it’s essential to consider the individual’s background, including age, education level, and premorbid intellectual functioning, when interpreting scores.

The manual also emphasizes the importance of examining patterns of strengths and weaknesses across different cognitive domains. For example, a patient may show significant impairment in memory but perform relatively well in attention and language. Identifying these patterns can provide valuable insights into the nature of cognitive dysfunction and guide targeted interventions.

The RBANS Scoring Manual serves as a vital resource for clinicians, enabling them to translate raw scores into clinically relevant information, ultimately aiding in the comprehensive assessment and management of neurocognitive conditions.

RBANS Scoring⁚ Research and Applications

The RBANS Scoring Manual PDF plays a crucial role in facilitating research using the RBANS, a neuropsychological test widely employed to assess cognitive functioning. The manual provides the necessary tools for researchers to conduct reliable and valid studies, ensuring consistent scoring and interpretation across different studies.

Researchers utilize the RBANS in a variety of contexts, including investigating the cognitive effects of neurological disorders, exploring the impact of medical treatments on cognitive function, and examining cognitive aging. The manual aids researchers in understanding the nuances of the RBANS, enabling them to design appropriate research protocols, analyze data effectively, and draw meaningful conclusions.

The manual’s standardization data and scoring procedures ensure that research findings can be compared across studies, enhancing the reliability and generalizability of research results. The RBANS Scoring Manual serves as a cornerstone for research endeavors focused on understanding and addressing cognitive dysfunction in diverse populations.

RBANS Scoring⁚ A Tool for Neurocognitive Assessment

The RBANS Scoring Manual PDF is instrumental in guiding clinicians in the use of the Repeatable Battery for the Assessment of Neuropsychological Status (RBANS) for comprehensive neurocognitive assessments. The manual provides a detailed framework for administering, scoring, and interpreting the RBANS, ensuring accurate and reliable evaluation of cognitive functioning in individuals suspected of having neurological deficits.

The RBANS, designed for adults aged 20-89 years, assesses cognitive domains including attention, language, visuospatial skills, memory, and executive function. The manual’s detailed instructions on scoring procedures and interpretation of results empower clinicians to identify cognitive strengths and weaknesses, aiding in the diagnosis and management of neurological conditions. The manual’s standardized norms provide a crucial reference point for comparing an individual’s performance to that of their age-matched peers, facilitating accurate assessment and clinical decision-making.

The RBANS Scoring Manual PDF is a valuable resource for clinicians working in various settings, including neurology, psychiatry, and rehabilitation, enabling them to conduct thorough neurocognitive assessments and provide appropriate interventions for individuals with neurological impairments.

RBANS Scoring⁚ Advantages and Limitations

The RBANS Scoring Manual PDF highlights both the strengths and limitations of the Repeatable Battery for the Assessment of Neuropsychological Status (RBANS) as a tool for neurocognitive assessment. While the RBANS offers several advantages, it’s crucial to acknowledge its limitations to ensure responsible and informed interpretation of test results.

One of the primary advantages of the RBANS is its brevity. The test can be administered in approximately 25 minutes, making it a practical option for busy clinical settings and individuals with limited attention spans. Additionally, the RBANS provides conormed domain scores, allowing for a comprehensive evaluation of multiple cognitive domains within a single assessment. The availability of alternate forms further enhances its utility by reducing the risk of practice effects and facilitating repeated assessments.

However, it’s important to recognize that the RBANS, like any neuropsychological test, has limitations. The manual acknowledges that the RBANS does not make adjustments for education levels, potentially impacting the interpretation of scores in individuals with varying educational backgrounds. Furthermore, the RBANS may not be as sensitive to subtle cognitive changes in individuals with mild cognitive impairment or in the early stages of dementia. Clinicians should consider these limitations when interpreting RBANS results and integrating them into a comprehensive assessment.

RBANS Scoring Manual⁚ Where to Find It

Acquiring the RBANS Scoring Manual PDF is straightforward, with several options available to meet diverse needs and preferences. For those seeking the traditional print format, the manual can be purchased directly from reputable publishers and online retailers specializing in psychological assessment materials. This option provides a tangible reference guide for frequent use and annotation. However, for those seeking a more accessible and portable option, digital versions of the manual are readily available.

The RBANS Update Scoring Template C (Print) can be purchased through online retailers, while the RBANS Update Q-global Manual (Digital) is accessible through Q-global, a platform providing digital resources for psychological assessments. This digital format allows for easy access, search functionality, and portability on various devices. Additionally, the RBANS Update Q-global Manual (Digital) is available in Spanish (Forms A and B), catering to a wider range of language needs.

Regardless of the chosen format, it’s crucial to ensure that the acquired manual is the most up-to-date version, as updates may include revised norms, scoring procedures, or additional research findings. The RBANS Scoring Manual PDF remains a valuable resource for professionals seeking to administer and interpret the RBANS effectively, ensuring accurate and reliable assessments of cognitive functioning.

Bykyler

ge universal remote manual 33709

GE Universal Remote Control 33709 Manual

The GE 33709 universal remote manual is a comprehensive guide that provides information on programming, features, troubleshooting, and other essential aspects of the remote control․ It includes a code list, device compatibility, warranty information, and FCC statement․ The manual is designed to help users easily understand and operate their GE universal remote control․

Introduction

Welcome to the GE 33709 Universal Remote Control user manual․ This comprehensive guide will walk you through the features, capabilities, and programming methods of your new remote․ The GE 33709 is designed to control a wide array of audio/video devices, including TVs, Blu-ray/DVD players, streaming media players, soundbars, cable receivers, and more․ This user-friendly remote simplifies your entertainment experience, allowing you to operate multiple devices with a single remote․ Throughout this manual, you’ll find detailed instructions, code lists, troubleshooting tips, and other valuable information to help you fully utilize your GE 33709 Universal Remote Control․ We encourage you to take the time to read through this manual carefully to familiarize yourself with the features and capabilities of your new remote․

Features and Capabilities

The GE 33709 Universal Remote Control boasts a range of features designed to enhance your entertainment experience․ Its intuitive layout and comprehensive button configuration allow you to easily control multiple devices with a single remote․ The GE 33709 features dedicated buttons for commonly used functions such as power, volume, channel up/down, and input selection․ It also includes special buttons for specific device types, like TV, DVD, CBL, and AUX․ This versatility ensures compatibility with a wide range of devices, simplifying your entertainment setup․ The remote’s compact design and ergonomic grip offer comfortable handling and convenient one-handed operation․ The GE 33709 also features a backlit display, making it easy to see the buttons in low-light conditions․ With its user-friendly design and comprehensive capabilities, the GE 33709 Universal Remote Control offers a convenient and efficient way to manage your entertainment system․

Programming Methods

The GE 33709 Universal Remote Control offers two primary programming methods⁚ Direct Code Entry and Automatic Code Search․ The Direct Code Entry method requires you to manually input a specific code corresponding to your device’s brand and model․ These codes are typically found in the code list included with your remote․ This method involves pressing a sequence of buttons on the remote to enter the code․ The Automatic Code Search method allows the remote to automatically search for the correct code for your device․ This involves pressing a combination of buttons on the remote, and the remote will cycle through various codes until it finds the right one․ The Automatic Code Search method is generally quicker and easier than the Direct Code Entry method․ It is recommended to consult the GE 33709 Universal Remote Control manual for detailed instructions on both programming methods․

Direct Code Entry

The Direct Code Entry method involves manually inputting a specific code for your device․ This method is typically used when you know the code for your device․ The codes are listed in the code list included with your remote․ To use the Direct Code Entry method, follow these steps⁚

Locate the code list included with your remote․ Find the section for the type of device you are programming (e․g․, TV, DVD, Cable)․
Locate the code for your device’s brand․ Many brands have multiple codes, so you may need to try a few codes until you find the one that works․
Press and hold down the SETUP button on the remote until the red light turns on․ Release the SETUP button․
Press and release the device button (e․g․, TV, DVD, CBL, AUX) corresponding to the device you are programming․
Enter the code for your device․
Test the remote to see if it is working․ If it is not, try other codes for your brand․

Automatic Code Search

The Automatic Code Search method allows the remote to automatically search for the correct code for your device․ This method is useful if you don’t know the code for your device or if you are unsure which code to use․ To use the Automatic Code Search method, follow these steps⁚

Press and hold down the SETUP button on the remote until the red light turns on․ Release the SETUP button․
Press and release the device button (e․g․, TV, DVD, CBL, AUX) corresponding to the device you are programming․
The remote will begin automatically searching for the correct code․ During the search, the red light on the remote will blink․
Once the remote finds the correct code, the red light will stay on․
Test the remote to see if it is working․ If it is not, you can repeat the automatic code search process․

Troubleshooting

If you are experiencing issues with your GE 33709 universal remote control, there are a few troubleshooting steps you can take to resolve the problem․ Here are some common issues and their solutions⁚

  • Remote is not responding⁚ Check the batteries․ Ensure they are properly installed and have sufficient power․ If the batteries are fine, try resetting the remote to factory settings․
  • Remote is not controlling the device⁚ Verify that the correct code has been programmed for the device․ You can use the Direct Code Entry method or the Automatic Code Search method to reprogram the remote․
  • Remote buttons are not working⁚ Examine the remote for any physical damage or debris that may be obstructing the buttons․ If necessary, gently clean the buttons with a soft cloth․
  • Device is not responding⁚ Check if the device is turned on and within the range of the remote․ If the device is powered on and within range, ensure that the device is not in a sleep mode or standby mode․

If none of these troubleshooting steps resolve the issue, you may need to contact GE customer support for further assistance․

Battery Installation

The GE 33709 universal remote control requires two AAA batteries for operation․ To install the batteries, follow these steps⁚

  1. Locate the battery compartment on the back of the remote control․ You’ll usually find it on the underside․
  2. Carefully slide the battery cover down or open the compartment latch, depending on your remote’s design․
  3. Insert two AAA batteries, ensuring that the positive (+) and negative (-) terminals align correctly with the markings inside the battery compartment․
  4. Close the battery compartment or slide the cover back into place, ensuring it clicks securely․

Once the batteries are installed, you can test the remote by pressing any button․ The remote should respond with a light or sound depending on its features․ If the remote does not work, double-check the battery installation and ensure the batteries are fresh․

Device Compatibility

The GE 33709 universal remote control is designed to be compatible with a wide range of audio and video devices․ It can control multiple devices, including televisions, DVD players, Blu-ray players, cable boxes, satellite receivers, streaming media players, soundbars, and more․ However, it is important to note that not all devices are compatible with the GE 33709 remote․

The remote uses infrared (IR) technology to communicate with devices․ To ensure compatibility, you should check the device’s manual or specifications to see if it supports IR control․ If the device uses a different communication protocol, such as Bluetooth or Wi-Fi, the GE 33709 remote will not be able to control it․

The GE 33709 remote’s compatibility is further determined by the availability of codes for specific device brands and models․ These codes are typically included in the remote’s manual or can be found online․ If a code for your specific device is not available, you may not be able to program the remote to control it․

Supported Devices

The GE 33709 universal remote control is designed to be compatible with a wide range of audio and video devices, including TVs, Blu-ray/DVD players, streaming media players, soundbars, cable receivers, and more․ It is particularly well-suited for popular brands like Samsung, Vizio, LG, Sony, Sharp, Roku, Apple TV, TCL, Panasonic, and various smart TVs․ The remote’s ability to control these devices is further enhanced by its support for streaming players, making it a versatile option for modern entertainment setups․

The GE 33709 remote’s compatibility with these devices allows users to control multiple entertainment sources with a single remote, simplifying their home theater experience․ However, it’s crucial to consult the remote’s manual or code list to verify compatibility with specific models and brands, as the remote’s functionality may vary depending on the device’s specifications and communication protocols․

It’s also worth noting that the GE 33709 remote is capable of operating thousands of audio/video devices, ensuring that it caters to a broad range of user needs and preferences․ This makes it an attractive option for those looking for a universal remote that can integrate seamlessly with their existing home entertainment system․

Code List

The GE 33709 universal remote control comes equipped with a comprehensive code list that enables it to control a wide array of audio and video devices․ This code list is typically included in the remote’s manual and serves as a valuable resource for programming the remote to specific devices․ The code list is organized by device type, such as TVs, DVD players, cable boxes, satellite receivers, and audio systems, making it easy for users to locate the appropriate code for their particular device․

To program the remote using the code list, users will need to follow the instructions provided in the manual․ These instructions typically involve entering the device’s code into the remote’s memory, allowing the remote to communicate with the device․ The manual will also outline the specific steps involved in entering the code, which may vary depending on the remote’s model and programming methods․

It’s important to note that the code list may not include all possible codes for every device․ In such cases, users may need to refer to the device’s own manual or consult the GE website for additional code information․ By utilizing the code list effectively, users can program the GE 33709 universal remote to control a variety of devices, simplifying their home entertainment experience․

Warranty Information

The GE 33709 universal remote control is typically backed by a limited warranty that covers defects in materials and workmanship․ The specific terms of the warranty may vary depending on the retailer and the country of purchase․ It’s crucial to review the warranty information provided with the remote or on the GE website to fully understand the coverage and limitations․

The warranty typically covers defects that occur during normal use, but may not cover damage caused by misuse, neglect, or accidents․ It’s essential to retain the original purchase receipt as proof of purchase for warranty claims․ To initiate a warranty claim, users may need to contact GE customer support or the retailer where the remote was purchased․

The warranty period for the GE 33709 universal remote control is typically stated in the warranty documentation․ It’s important to note that the warranty does not cover batteries or other consumable parts․ By understanding the warranty terms and conditions, users can be confident that their GE 33709 universal remote control is protected against manufacturing defects for a specified duration․

FCC Statement

The FCC Statement included in the GE 33709 universal remote control manual ensures compliance with Federal Communications Commission regulations․ This statement signifies that the device has been tested and found to meet the FCC’s requirements for radio frequency interference (RFI)․ It guarantees that the remote control operates within specified limits to minimize potential interference with other electronic devices․

The FCC Statement typically includes a declaration of compliance, stating that the device meets the FCC’s requirements․ It might also mention the device’s specific FCC ID number, which is a unique identifier assigned by the FCC․ This information is essential for verifying the authenticity and compliance of the GE 33709 universal remote control․

The statement may also provide instructions on how to minimize potential interference, such as using the recommended cables and connecting the device to a properly grounded outlet․ Users should carefully review the FCC Statement to understand their responsibilities and ensure that the remote control is operated in accordance with FCC regulations․

User Manual Download

The GE 33709 universal remote control user manual is readily available for download in PDF format; You can access it online through various platforms, including manufacturer websites, online retailers, and dedicated user manual repositories․ These sources often provide a free download option, allowing you to obtain the manual without any cost․

To download the manual, simply search for “GE 33709 universal remote manual PDF” on your preferred search engine․ You can also visit the official GE website and navigate to their support section, where you might find a dedicated page for user manuals․ Once you locate the manual, click on the download link, and it will be saved to your computer․

Having a digital copy of the manual offers several advantages․ You can easily access it anytime, anywhere, without needing a physical copy․ You can also print it out if desired or share it with others․ The downloaded manual serves as a comprehensive guide to operating and troubleshooting your GE 33709 universal remote control․

Video Tutorials

In addition to the written manual, video tutorials are a valuable resource for understanding the GE 33709 universal remote control․ These tutorials provide a visual demonstration of programming steps, device setup, and troubleshooting tips․ You can find these videos on various platforms like YouTube, Vimeo, and dedicated product review websites․

To access video tutorials, simply search for “GE 33709 universal remote programming tutorial” or “GE 33709 universal remote setup guide” on YouTube or your preferred video platform․ You can filter the results by relevance and date to find the most up-to-date and helpful videos․ Many tutorials are created by users, product reviewers, and even the manufacturer themselves, providing a diverse range of perspectives․

Video tutorials offer a more engaging and intuitive learning experience․ They can visually demonstrate the steps involved in programming the remote, making the process easier to grasp․ You can also watch tutorials at your own pace and replay sections as needed․ This visual format can be particularly helpful for those who prefer a more interactive learning approach․

Frequently Asked Questions

The GE 33709 universal remote control is a popular choice for controlling various audio/video devices․ As with any electronic device, users often encounter questions or challenges․ Here are some common inquiries regarding the GE 33709 universal remote control⁚

How do I program the GE 33709 universal remote?

Programming the GE 33709 universal remote is a straightforward process․ You can use either the direct code entry method or the automatic code search method․ The manual provides detailed instructions for both methods, as well as a code list for various devices․

Why isn’t my GE 33709 universal remote working?

If your remote isn’t functioning, check if the batteries are properly installed and have sufficient power․ Also, ensure the remote is pointed directly at the device you are trying to control․ If the issue persists, try reprogramming the remote or check the manual for troubleshooting tips․

Is the GE 33709 universal remote compatible with my device?

The GE 33709 universal remote is compatible with a wide range of devices, including TVs, DVD players, cable boxes, satellite receivers, and more․ Refer to the code list in the manual or online resources to confirm compatibility with your specific device․

Customer Reviews

Customer reviews for the GE 33709 universal remote control are generally positive, highlighting its affordability, ease of use, and versatility․ Many users appreciate its ability to control multiple devices with one remote, simplifying their entertainment setup․ However, some reviews mention limitations in device compatibility, particularly with newer smart TVs or streaming devices․

Positive reviews often focus on the remote’s simple programming process, user-friendly layout, and responsive buttons․ Many users find it easy to set up and operate, even for those unfamiliar with universal remotes․ The remote’s backlit buttons are also praised for their convenience in low-light conditions․

Negative reviews, while less frequent, often express concerns about compatibility issues․ Some users report difficulty finding the correct codes for their specific devices, particularly for newer models․ Others mention that the remote’s range might be limited in certain situations, requiring closer proximity to the device being controlled․

Bykyler

battery charger schumacher manual

Schumacher Battery Charger Manuals⁚ A Comprehensive Guide

Schumacher battery chargers are a popular choice for both automotive and home use, known for their reliability and affordability. Understanding your Schumacher battery charger is crucial for safe and effective operation, and this guide will provide a comprehensive overview of Schumacher battery charger manuals, covering key features, safety precautions, and troubleshooting tips.

Introduction

Schumacher battery chargers have become a staple in garages and workshops worldwide, offering a reliable solution for maintaining and reviving various types of batteries. Whether you’re dealing with a car battery that needs a jumpstart, a motorcycle battery that’s lost its charge, or a deep-cycle battery for your RV, Schumacher has a charger to meet your needs. However, with a diverse range of models and features, navigating the complexities of Schumacher battery chargers can be daunting. This is where the importance of Schumacher battery charger manuals comes into play.

These manuals serve as your comprehensive guide to understanding the intricacies of your specific charger, ensuring safe and efficient operation. From deciphering the charging modes to troubleshooting common issues, Schumacher battery charger manuals are an essential resource for maximizing the performance and longevity of your charger.

This guide will delve into the world of Schumacher battery charger manuals, providing a detailed exploration of their features, benefits, and how to effectively utilize them. We’ll cover essential aspects such as understanding battery charging basics, navigating the different types of chargers, and exploring the safety precautions that are paramount for ensuring a smooth and trouble-free charging experience.

Types of Schumacher Battery Chargers

Schumacher offers a wide variety of battery chargers designed to cater to different battery types and charging needs. Understanding the different types of chargers available can help you choose the right one for your specific application. Here’s a breakdown of some common Schumacher battery charger categories⁚

  • Standard Battery Chargers⁚ These chargers are designed for general-purpose use, suitable for maintaining and charging 6V and 12V lead-acid batteries commonly found in cars, motorcycles, and ATVs. They typically feature basic charging modes, such as trickle charge and fast charge, and may include features like automatic shut-off for safety.
  • Smart Chargers⁚ Smart chargers incorporate advanced technology to automatically adjust charging parameters based on the battery’s condition and type. They offer multiple charging modes, including desulfation for reviving deeply discharged batteries, and often feature diagnostics to identify battery issues.
  • Battery Maintainers⁚ These chargers are designed to keep batteries in top condition by providing a trickle charge over extended periods. They are ideal for maintaining batteries that are not in regular use, such as those in classic cars or seasonal vehicles.
  • Deep-Cycle Chargers⁚ Deep-cycle batteries, commonly used in RVs, golf carts, and marine applications, require specialized chargers. Schumacher offers deep-cycle chargers that provide the necessary power and charging profiles for these types of batteries.
  • On-Board Battery Chargers⁚ These compact chargers are designed for permanent installation in vehicles, allowing you to keep your battery topped up while driving. They typically feature automatic charging and maintenance modes.

Navigating through the various types of Schumacher battery chargers can be overwhelming. Consulting your specific Schumacher battery charger manual is essential for understanding the features, capabilities, and limitations of your chosen model, ensuring safe and efficient operation.

Understanding Battery Charging Basics

Before diving into the specifics of Schumacher battery charger manuals, understanding the fundamentals of battery charging is essential for safe and effective operation. A battery charger works by converting AC (alternating current) power from your home outlet into DC (direct current) power, which is the type of electricity your battery needs to recharge. The process involves delivering a controlled flow of electrical current to the battery, restoring its chemical energy.

Battery charging involves several key parameters⁚

  • Voltage⁚ The voltage of a charger should match the voltage of the battery being charged. Most car batteries are 12V, while some motorcycles and ATVs may use 6V batteries.
  • Amperage⁚ The amperage (or current) determines the charging rate. A higher amperage leads to faster charging but can potentially damage the battery if not used correctly.
  • Charging Modes⁚ Different battery chargers offer various charging modes, each tailored to a specific stage of the charging process. Common modes include⁚
    • Bulk Charge⁚ The initial rapid charging phase, where the battery is quickly brought up to a high charge level.
    • Absorption Charge⁚ A slower charging phase where the battery voltage is maintained at a specific level until it reaches full capacity.
    • Trickle Charge⁚ A very low current charge used to maintain a battery’s charge over extended periods.
    • Desulfation⁚ A specialized mode designed to revitalize batteries that have become sulfated, a process that can reduce their capacity.

Understanding these charging basics will help you navigate the information in your Schumacher battery charger manual and make informed decisions about charging your battery safely and effectively.

Schumacher Battery Charger Manual Features

Schumacher battery charger manuals are designed to provide comprehensive instructions and information to ensure safe and effective use of their products. These manuals typically include a range of features, designed to guide users through the charging process and troubleshoot any issues that may arise.

Here are some common features you can expect to find in a Schumacher battery charger manual⁚

  • Product Specifications⁚ Detailed information about the charger’s voltage, amperage, charging modes, and other technical specifications. This helps you understand the charger’s capabilities and ensure it’s compatible with your battery.
  • Safety Precautions⁚ A comprehensive section on safety procedures to follow when using the charger. This may include warnings about potential hazards like electrical shock, fire, or battery explosion, and instructions for proper handling of the charger and battery.
  • Step-by-Step Instructions⁚ Clear and concise instructions on how to connect the charger to the battery, select the appropriate charging mode, and monitor the charging process. These instructions are typically illustrated with diagrams for easy understanding.
  • Troubleshooting Guide⁚ A section dedicated to identifying and resolving common problems that may occur during charging, such as battery not charging, charger not turning on, or incorrect voltage readings. This guide often provides step-by-step solutions to help users diagnose and fix issues.
  • Maintenance Tips⁚ Recommendations for maintaining the charger’s performance and extending its lifespan. This may include instructions for cleaning the charger, storing it properly, and inspecting the cables and connections for wear or damage.
  • Warranty Information⁚ Details about the charger’s warranty coverage, including duration, terms, and conditions. Understanding your warranty rights is crucial in case any issues arise with the charger.

By carefully reviewing the features of your Schumacher battery charger manual, you can ensure you’re using the product safely, effectively, and to its full potential.

Safety Precautions and Best Practices

When using a Schumacher battery charger, safety should always be your top priority. The manuals provided with these chargers contain detailed safety precautions and best practices to ensure a safe and successful charging experience. It’s crucial to read and understand these instructions before connecting the charger to your battery.

Here are some key safety precautions and best practices to follow⁚

  • Disconnect the Battery⁚ Always disconnect the battery terminals from the vehicle before connecting the charger. This prevents accidental electrical shorts or shocks.
  • Wear Protective Gear⁚ Use safety glasses and gloves when handling batteries and connecting the charger. This protects your eyes and hands from potential hazards like acid splashes or electrical shocks.
  • Avoid Sparks⁚ Do not use the charger in a flammable environment, and be cautious of sparks or open flames around the battery. Battery fumes can be flammable and ignite if exposed to a spark.
  • Inspect Connections⁚ Ensure all connections are secure and free of corrosion before turning on the charger. Loose or corroded connections can lead to overheating, sparking, or damage to the charger or battery.
  • Follow Charging Instructions⁚ Always adhere to the recommended charging times and current settings specified in the manual. Overcharging or using incorrect settings can damage the battery.
  • Ventilate the Area⁚ Charge the battery in a well-ventilated area to allow fumes to dissipate. Battery fumes can be harmful if inhaled.
  • Monitor the Charger⁚ Keep an eye on the charger and battery during the charging process. Look for any signs of overheating, unusual noises, or leaks. If you notice anything out of the ordinary, disconnect the charger immediately.
  • Store Properly⁚ When not in use, store the charger in a dry, cool place away from direct sunlight and moisture. This helps prevent corrosion and extends its lifespan.

By diligently following these safety precautions and best practices, you can ensure a safe and effective charging experience with your Schumacher battery charger.

Troubleshooting Common Problems

While Schumacher battery chargers are generally reliable, you may encounter occasional issues. Understanding common problems and troubleshooting steps can help you resolve them effectively. Here are some frequent issues and how to address them⁚

  • Charger Not Turning On⁚ Check the power source and ensure the charger is plugged in correctly. Inspect the fuse or circuit breaker and replace it if necessary. If the problem persists, the charger may need repair;
  • Charger Not Charging⁚ Verify that the battery terminals are clean and connected securely. Ensure the charging cables are properly connected to the charger and battery. If the issue continues, inspect the charging cables for any damage or breaks. If the cables are in good condition, the problem may lie with the charger itself.
  • Charger Overheating⁚ Overheating can occur due to incorrect settings, faulty connections, or a malfunctioning charger. Ensure the charger is properly ventilated and that all connections are secure. If the problem persists, disconnect the charger immediately and allow it to cool down. Contact Schumacher customer support for further assistance.
  • Charger Not Detecting Battery⁚ Make sure the battery terminals are clean and properly connected. Some chargers may require specific battery types or sizes. Refer to the manual for compatibility information. If the battery is faulty or damaged, the charger may not be able to detect it.
  • Battery Not Accepting Charge⁚ A damaged or deeply discharged battery may refuse to accept a charge. Check the battery’s voltage and try charging it with a different charger. If the battery is faulty, it needs replacement.

If you’re unable to resolve the issue, refer to the detailed troubleshooting guide in your Schumacher battery charger manual. It may offer more specific instructions and solutions for the problem you’re experiencing. Contacting Schumacher customer support can also provide additional assistance and guidance.

Maintaining Your Schumacher Battery Charger

Proper maintenance is crucial for extending the lifespan of your Schumacher battery charger and ensuring its optimal performance. Here’s a guide to keeping your charger in top condition⁚

  • Regular Cleaning⁚ Dust and debris can accumulate on the charger’s exterior and internal components, affecting its functionality. Clean the charger regularly using a soft, dry cloth. Avoid using harsh chemicals or abrasive cleaners. If the charger has any vents, ensure they are clear of obstructions to allow for proper ventilation.
  • Storage⁚ When not in use, store your charger in a cool, dry place, away from direct sunlight and moisture. Avoid storing it near heat sources or corrosive materials. Ensure the charger is disconnected from the power source when not in use.
  • Inspect Cables⁚ Regularly check the charging cables for any signs of wear, damage, or fraying. Damaged cables can create a safety hazard and should be replaced immediately. Ensure the connections are secure and free from corrosion.
  • Battery Terminal Connections⁚ Clean the battery terminals with a wire brush or a terminal cleaning solution to ensure a good electrical connection. If corrosion is present, it can impede charging and damage the battery. Always wear safety goggles and gloves when working with battery terminals.
  • Manual Instructions⁚ Refer to your Schumacher battery charger manual for specific maintenance recommendations and any additional cleaning or inspection procedures. The manual may provide information on troubleshooting common problems and recommended maintenance intervals.

By following these maintenance tips, you can ensure your Schumacher battery charger continues to perform reliably and safely, extending its lifespan and maximizing its effectiveness in charging your batteries.

Choosing the Right Schumacher Charger for Your Needs

With a variety of Schumacher battery chargers available, selecting the right one for your specific needs is crucial. Consider the following factors to make an informed decision⁚

  • Battery Type⁚ Schumacher chargers are designed for specific battery types, such as lead-acid, lithium-ion, or AGM. Identify the battery type you need to charge and ensure the charger is compatible. The manual will specify the compatible battery types.
  • Battery Voltage⁚ Most car batteries operate at 12 volts, while some motorcycles and other vehicles may use 6 volts. Choose a charger with the appropriate voltage output for your battery. The manual will clearly state the charger’s voltage rating.
  • Amperage⁚ Amperage refers to the charging current, and higher amperage means faster charging. Consider the size and capacity of the battery you are charging. A higher amperage charger is generally recommended for larger batteries, while lower amperage chargers are suitable for smaller batteries.
  • Features⁚ Schumacher chargers offer various features, such as automatic charging modes, trickle charging, and maintenance modes. Consider the features that are most important to you, such as automatic shutdown, reverse polarity protection, and spark-free connections. The manual will provide details about the charger’s features and how to utilize them.
  • Size and Portability⁚ Think about where you will be using the charger and how easy it needs to be to transport. Some chargers are compact and portable, while others are larger and meant for stationary use.

By carefully considering these factors and referring to the Schumacher battery charger manual, you can select the most suitable charger for your specific needs, ensuring safe, efficient, and reliable charging for your batteries.

Bykyler

electric fireplace manual

Electric Fireplace Manual⁚ A Comprehensive Guide

This comprehensive guide will provide you with all the information you need to safely install, operate, and maintain your electric fireplace. We will cover everything from safety precautions to troubleshooting tips, ensuring you have a warm and inviting ambiance in your home.

Introduction

Welcome to the world of electric fireplaces, a modern and convenient way to bring the warmth and ambiance of a traditional fireplace into your home. Electric fireplaces offer a range of benefits, including ease of installation, energy efficiency, and safety features. This manual is designed to guide you through the installation, operation, and maintenance of your electric fireplace, ensuring you enjoy its benefits for years to come. We will cover everything from safety precautions to troubleshooting tips, empowering you to make the most of this elegant and functional addition to your living space.

Electric fireplaces are becoming increasingly popular due to their versatility and ease of use. They can be installed in a variety of locations, from traditional living rooms to modern bedrooms, and can be customized to complement any décor. Whether you are seeking a realistic flame effect for ambiance or supplemental heating for chilly evenings, an electric fireplace offers a convenient and stylish solution.

This manual is your comprehensive resource for understanding and utilizing your electric fireplace. It is essential to read and understand all the information provided before installing or operating your unit. By adhering to the instructions outlined in this manual, you can ensure the safety and longevity of your electric fireplace, allowing you to enjoy its warmth and beauty for many years to come.

Safety Precautions

Your safety is our utmost priority. Please take the time to read and understand these safety precautions before installing, operating, or maintaining your electric fireplace. Failure to follow these instructions could result in fire, electric shock, or personal injury.

Never leave the electric fireplace unattended while it is operating. Always turn off the unit and unplug it when not in use. This precaution is especially important if you have children or pets in the home.
Do not burn wood or other materials in the electric fireplace. These units are designed for electric operation only. Burning combustible materials can cause a fire hazard.
Keep flammable materials, such as curtains, furniture, and paper, at least three feet away from the electric fireplace. This will help prevent accidental fires.
Do not place the electric fireplace near water or any source of moisture. The unit should be kept in a dry location to prevent electric shock or damage.
Never use the electric fireplace if the cord or plug is damaged. Replace any damaged parts immediately.
Do not tamper with the electric fireplace’s internal components. If you need to repair or service the unit, contact a qualified technician.
Always unplug the electric fireplace before cleaning or performing any maintenance. This will prevent electric shock.
Do not use the electric fireplace in a bathroom, laundry area, or any other location where it may be exposed to water. The unit should be kept in a dry location to prevent electric shock or damage.

By following these simple safety precautions, you can help ensure a safe and enjoyable experience with your electric fireplace.

Installation

Installing your electric fireplace is a relatively straightforward process, but it’s crucial to follow the instructions carefully to ensure proper operation and safety. Here’s a general guide, but always refer to your specific model’s manual for detailed instructions.

Choose the right location. Select a spot with adequate ventilation and away from flammable materials. Ensure the area is level and can support the fireplace’s weight.
Prepare the wall. If mounting on the wall, use appropriate anchors for your wall type. If installing in a recess, ensure the opening is the correct size and shape for your model.
Connect the power cord. Plug the fireplace into a dedicated, grounded outlet. Never use an extension cord, as this can overload the circuit and cause a fire hazard.
Secure the fireplace. Follow the manufacturer’s instructions to secure the fireplace to the wall or recess. Ensure it’s firmly mounted to prevent it from tipping over.
Check for proper operation. Turn on the fireplace and test all features, ensuring everything works correctly.

If you’re unsure about any aspect of the installation process, it’s always best to consult a qualified electrician or contractor. They can ensure the installation is done safely and correctly, minimizing the risk of problems later on.

Operation

Operating your electric fireplace is simple and user-friendly. Most models feature straightforward controls for adjusting the flame effects, heat output, and other settings. Here’s a general overview, but always refer to your specific model’s user manual for detailed instructions.

Turn on the power. Plug the fireplace into a dedicated, grounded outlet.
Choose your flame effect. Many electric fireplaces offer multiple flame color options, such as orange, blue, or a combination, allowing you to customize the ambiance. Use the controls to select your desired flame effect.
Adjust the heat output. Most models have adjustable heat settings to provide varying levels of warmth. Select the desired heat level based on your preference and the size of the room.
Utilize the remote control (if applicable). Many electric fireplaces come with remote controls for convenient operation from anywhere in the room.
Turn off the fireplace when not in use. Always remember to turn off the fireplace and unplug it when you’re not using it.

Electric fireplaces are designed for safety and convenience. However, it’s always important to exercise caution when operating any electrical appliance. Never leave the fireplace unattended while it’s running and follow all safety guidelines outlined in your user manual.

Maintenance

Regular maintenance is essential for keeping your electric fireplace in optimal condition and ensuring its longevity. Follow these simple steps to maintain your fireplace and extend its lifespan⁚

Dusting⁚ Dust the fireplace regularly using a soft cloth or brush. Avoid using harsh chemicals or abrasive cleaners that could damage the finish.
Cleaning the glass⁚ Wipe the glass with a clean, soft cloth and a mild glass cleaner. Avoid using harsh chemicals or abrasive cleaners that could scratch the glass.
Cleaning the logs, crystals, or pebbles⁚ If your fireplace has decorative logs, crystals, or pebbles, gently wipe them with a damp cloth or brush to remove dust or debris.
Inspecting the heating element⁚ Check the heating element for any signs of damage, such as cracks, burns, or loose wires. If you notice any damage, immediately unplug the fireplace and contact a qualified technician for repairs.
Checking the electrical connections⁚ Inspect the electrical cord and plug for any signs of damage, such as fraying, cracks, or loose wires. If you notice any damage, immediately unplug the fireplace and contact a qualified technician for repairs.
Storing for the season⁚ If you’re storing the fireplace for an extended period, clean it thoroughly and store it in a dry, cool place.

By following these simple maintenance tips, you can keep your electric fireplace looking its best and functioning reliably for years to come.

Troubleshooting

While electric fireplaces are generally reliable, occasional issues can arise. Here are some common problems and their potential solutions⁚

Fireplace not turning on⁚

  • Check the power source⁚ Ensure the fireplace is plugged in securely and the outlet is working.
  • Check the circuit breaker⁚ Make sure the circuit breaker hasn’t tripped.
  • Inspect the electrical cord and plug⁚ Look for damage, such as fraying or loose wires.
  • Reset the temperature cutoff switch (if applicable)⁚ Some fireplaces have a temperature cutoff switch that may need to be reset. Consult your manual for instructions.

Fireplace not heating⁚

  • Check the heat setting⁚ Ensure the heat setting is turned on.
  • Inspect the heating element⁚ Look for damage or signs of malfunction.
  • Check the thermostat⁚ Make sure the thermostat is set to the desired temperature.

Flickering or dim flames⁚

  • Check the bulb⁚ If your fireplace uses a light bulb, replace it with a new one.
  • Clean the glass⁚ Dust and debris on the glass can affect the light output.

Unusual noises⁚

  • Check for loose parts⁚ Ensure all parts are securely attached.
  • Inspect the fan⁚ If your fireplace has a fan, make sure it’s running smoothly and not making any unusual sounds.

If you’re unable to resolve the issue, contact a qualified technician for assistance.

Frequently Asked Questions

Here are some frequently asked questions about electric fireplaces⁚

Are electric fireplaces safe?

  • Yes, electric fireplaces are generally considered safe when used according to the manufacturer’s instructions. They do not produce real flames or emit harmful gases, making them a good option for families with children or pets.

How much energy do electric fireplaces use?

  • Electric fireplaces vary in energy consumption. Look for models with an Energy Star rating for greater energy efficiency. Check the wattage rating on the fireplace or in the user manual.

Can I install an electric fireplace myself?

  • Most electric fireplaces are relatively easy to install. However, it’s important to consult the installation manual and follow the instructions carefully. If you’re unsure, it’s best to consult a professional electrician.

Can I use an electric fireplace in a small room?

  • Yes, electric fireplaces are suitable for small rooms. They produce a comfortable amount of heat without overheating the space.

How often should I clean my electric fireplace?

  • Regularly clean the glass, the log set (if applicable), and the interior of the fireplace to prevent dust and debris buildup. Check your manual for specific cleaning instructions.

If you have additional questions, refer to your owner’s manual or contact the manufacturer for assistance.

Warranty Information

Your electric fireplace comes with a manufacturer’s warranty, providing protection against defects in materials and workmanship. To understand the specific terms and conditions of your warranty, carefully review the warranty document included with your fireplace. It’s important to keep this document in a safe place for future reference.

Typically, electric fireplace warranties cover⁚

  • Parts and Labor⁚ The warranty will specify the duration for which the manufacturer covers repairs or replacements for defective parts and labor costs associated with those repairs.
  • Exclusions⁚ The warranty may exclude coverage for certain issues, such as damage caused by misuse, neglect, accidents, or unauthorized repairs.
  • Registration⁚ Some manufacturers require you to register your fireplace online or by mail within a certain timeframe to activate the warranty. Be sure to follow the registration instructions to ensure your warranty is valid.

If you experience any problems with your electric fireplace during the warranty period, contact the manufacturer’s customer service department for assistance. They will guide you through the warranty claim process, which may involve providing proof of purchase and a description of the issue.

Contact Information

For any inquiries, questions, or concerns related to your electric fireplace, it’s essential to have the manufacturer’s contact information readily available. This information can typically be found on the warranty document, product packaging, or the manufacturer’s website.

Here’s what you should look for in the contact information⁚

  • Customer Service Phone Number⁚ This is the primary way to reach the manufacturer for immediate assistance with product-related issues, warranty claims, or general inquiries.
  • Email Address⁚ Many manufacturers provide an email address for submitting inquiries, feedback, or warranty claims. This can be a convenient option if you prefer written communication.
  • Website⁚ The manufacturer’s website is a valuable resource for information about your electric fireplace, including user manuals, troubleshooting guides, warranty details, and contact information for specific departments.
  • Mailing Address⁚ This is important for sending warranty claims or other official correspondence to the manufacturer.

By keeping this contact information readily accessible, you can easily reach out to the manufacturer for support whenever needed.

An electric fireplace offers a stylish and convenient way to add warmth and ambiance to your home without the hassle of traditional fireplaces. By following the instructions in this manual, you can ensure the safe and efficient operation of your electric fireplace for years to come.

Remember to prioritize safety by adhering to the precautions outlined in this manual. Regularly maintain your electric fireplace to prevent issues and prolong its lifespan. If you encounter any problems, refer to the troubleshooting section for possible solutions.

Enjoy the warmth and beauty of your electric fireplace, creating a cozy and inviting atmosphere for you and your loved ones. If you have any questions or require further assistance, don’t hesitate to contact the manufacturer using the contact information provided in this manual.

Bykyler

2013 lexus rx 350 manual

2013 Lexus RX 350⁚ A Comprehensive Guide

This guide provides a detailed overview of the 2013 Lexus RX 350‚ covering its exterior and interior design‚ engine performance‚ fuel efficiency‚ safety features‚ technology‚ and more. We’ll also explore the 2013 Lexus RX 350 Owners Manual‚ which is an essential resource for understanding your vehicle’s features and operation. Whether you’re a prospective buyer or a current owner‚ this comprehensive guide will give you a thorough understanding of this popular luxury SUV.

Introduction

The 2013 Lexus RX 350 is a midsize luxury SUV that seamlessly blends style‚ comfort‚ and performance. This model marked a significant evolution in the RX line‚ featuring refined styling‚ advanced technology‚ and a focus on passenger well-being. The 2013 RX 350 is known for its smooth ride‚ spacious interior‚ and impressive fuel efficiency. This comprehensive guide will provide you with a deep understanding of this popular vehicle‚ covering everything from its exterior design to its advanced safety features and the essential 2013 Lexus RX 350 Owners Manual.

The 2013 RX 350 is designed to provide a luxurious and comfortable driving experience. Its sleek exterior lines and sophisticated interior create a sense of refinement and sophistication. Whether you’re navigating city streets or embarking on a long road trip‚ the RX 350 is a car that’s sure to impress.

Exterior Design and Features

The 2013 Lexus RX 350 boasts a sleek and modern exterior design that embodies the brand’s commitment to luxury and sophistication. The front fascia features a distinctive spindle grille with a chrome surround‚ flanked by sharp‚ angular headlights that give the RX 350 a commanding presence. The sculpted hood lines flow seamlessly into the windshield‚ contributing to a sense of aerodynamic efficiency.

The RX 350’s profile is characterized by a sloping roofline that creates a sporty and elegant silhouette. The large‚ panoramic sunroof allows for ample natural light to fill the cabin‚ enhancing the feeling of spaciousness. The rear of the RX 350 features LED taillights that wrap around the sides of the vehicle‚ adding to its distinctive design. The large‚ rear spoiler not only enhances the RX 350’s aerodynamic performance but also contributes to its overall sporty aesthetic;

The 2013 RX 350 offers a range of exterior features designed to enhance both style and functionality. These include⁚

  • Power-adjustable and heated side mirrors
  • Rain-sensing windshield wipers
  • A rearview camera
  • Optional roof rails for added cargo versatility

Interior Design and Features

Step inside the 2013 Lexus RX 350‚ and you’ll be greeted by a luxurious and refined interior that prioritizes comfort and convenience. The cabin features high-quality materials‚ including soft-touch leather upholstery‚ wood trim‚ and metallic accents‚ creating an atmosphere of sophistication and refinement. The spacious interior offers ample legroom and headroom for both front and rear passengers‚ making it ideal for long journeys.

The driver-focused cockpit is designed to enhance ergonomics and driver comfort. The multifunction steering wheel provides easy access to audio‚ cruise control‚ and Bluetooth controls. The instrument panel features a clear and intuitive layout‚ with a large‚ analog speedometer and tachometer flanked by a multi-information display that provides vital driving information.

The 2013 Lexus RX 350 is equipped with a wide array of interior features‚ including⁚

  • Dual-zone climate control
  • Heated and ventilated front seats
  • A power-adjustable driver’s seat with memory settings
  • A premium sound system with multiple speakers and a subwoofer
  • A navigation system with a touchscreen interface

The 2013 RX 350’s interior offers a harmonious blend of luxury‚ technology‚ and comfort‚ making every drive a pleasant experience.

Engine and Performance

Powering the 2013 Lexus RX 350 is a 3.5-liter V6 engine that delivers a smooth and responsive driving experience. This engine generates 270 horsepower and 248 lb-ft of torque‚ providing ample power for both city driving and highway cruising. The engine is paired with an eight-speed automatic transmission‚ which shifts seamlessly and efficiently‚ contributing to the RX 350’s refined driving character.

The 2013 RX 350 offers a comfortable and composed ride‚ thanks to its well-tuned suspension system. The suspension effectively absorbs bumps and irregularities in the road‚ providing a smooth and quiet ride for passengers. The RX 350’s handling is also impressive‚ with a balanced and predictable response‚ making it a joy to drive on winding roads.

While the RX 350 is not designed for aggressive performance‚ it offers sufficient power and handling for everyday driving needs. Its smooth and refined performance‚ coupled with its comfortable ride‚ makes it an excellent choice for those seeking a luxurious and capable SUV.

Fuel Efficiency and Range

The 2013 Lexus RX 350 is known for its respectable fuel economy‚ considering its size and performance; It achieves an EPA-estimated 18 mpg city‚ 28 mpg highway‚ and 22 mpg combined. This fuel efficiency is largely attributed to its efficient V6 engine and the eight-speed automatic transmission. The RX 350’s fuel tank capacity is 19.2 gallons‚ which provides a decent driving range.

While the RX 350’s fuel efficiency is not the most impressive in its class‚ it offers a reasonable balance between performance and economy. For those looking for a luxury SUV with better fuel efficiency‚ the RX 350’s hybrid counterpart‚ the RX 450h‚ might be a better option. The RX 450h boasts an EPA-estimated 33 mpg city‚ 30 mpg highway‚ and 31 mpg combined.

Ultimately‚ the RX 350’s fuel efficiency is a good compromise for its size‚ performance‚ and luxury features. It’s a capable SUV that can get you where you need to go while offering a comfortable and enjoyable driving experience.

Safety Features

The 2013 Lexus RX 350 is equipped with a comprehensive suite of safety features designed to protect occupants in a variety of situations. Standard safety features include anti-lock brakes (ABS)‚ electronic brake force distribution (EBD)‚ brake assist‚ stability control‚ traction control‚ and multiple airbags‚ including front‚ side‚ and curtain airbags.

In addition to these standard features‚ the RX 350 offers optional safety features such as a blind spot monitor‚ rear cross-traffic alert‚ lane departure warning‚ and a pre-collision system. The pre-collision system uses sensors to detect potential collisions and can automatically apply the brakes or even bring the vehicle to a stop.

The RX 350’s safety features have earned it high ratings from both the National Highway Traffic Safety Administration (NHTSA) and the Insurance Institute for Highway Safety (IIHS). The RX 350 received a five-star overall safety rating from the NHTSA and was named a Top Safety Pick+ by the IIHS.

Technology and Infotainment

The 2013 Lexus RX 350 is equipped with a wide range of technology and infotainment features designed to enhance your driving experience. The standard infotainment system includes a 7-inch touchscreen display‚ a 10-speaker sound system‚ Bluetooth connectivity‚ and a USB port. Optional features include a navigation system‚ a Mark Levinson premium sound system‚ a rear-seat entertainment system‚ and a head-up display.

The RX 350’s technology features are designed to be user-friendly and intuitive. The touchscreen display is responsive and easy to navigate‚ and the voice recognition system is accurate and reliable. The navigation system is comprehensive and provides detailed maps and directions.

The RX 350’s infotainment system is also well-integrated with the vehicle’s safety features. For example‚ the navigation system can provide real-time traffic updates‚ and the Bluetooth system can be used to make hands-free calls. The RX 350’s technology and infotainment features make it a comfortable and convenient vehicle to drive.

2013 Lexus RX 350 Owners Manual

The 2013 Lexus RX 350 Owners Manual is your comprehensive guide to understanding and operating your vehicle. This essential document is available online through My Lexus and covers a wide range of topics‚ including⁚

  • Before Driving⁚ Information on the hybrid system (RX450h)‚ adjusting and operating features like door locks‚ mirrors‚ and the steering column.
  • When Driving⁚ Driving‚ stopping‚ and safe-driving information.
  • Interior Features⁚ Air conditioning‚ audio systems‚ and other interior features.
  • Exterior Features⁚ Exterior lights‚ wipers‚ and other exterior features.
  • Maintenance⁚ Routine maintenance schedules‚ fluid levels‚ and other maintenance-related information.
  • Troubleshooting⁚ Identifying and addressing common problems.

The Owners Manual also includes detailed diagrams and illustrations to help you understand the operation of your vehicle’s systems. It is highly recommended that you familiarize yourself with the contents of your Owners Manual to ensure you are driving your RX 350 safely and efficiently.

The 2013 Lexus RX 350 stands as a testament to the brand’s commitment to luxury and performance. This midsize SUV offers a compelling blend of comfort‚ style‚ and driving dynamics. Its spacious interior‚ advanced technology features‚ and smooth handling make it a highly desirable option for discerning drivers. Whether you’re cruising through city streets or embarking on a road trip‚ the RX 350 delivers a sophisticated and enjoyable driving experience.

The 2013 RX 350 Owners Manual serves as an invaluable resource for owners‚ providing detailed information about every aspect of the vehicle. By familiarizing yourself with the manual‚ you can gain a comprehensive understanding of your RX 350’s features and capabilities‚ enhancing your ownership experience and ensuring safe and efficient operation.