Ski Binding Size Guide: A Comprehensive Overview (Updated 02/26/2026)
Navigating the world of ski bindings requires understanding release mechanisms, crucial for safety and performance; DIN settings, standardized by the Deutsches Institut für Normung, are key.
Understanding Ski Binding Functionality
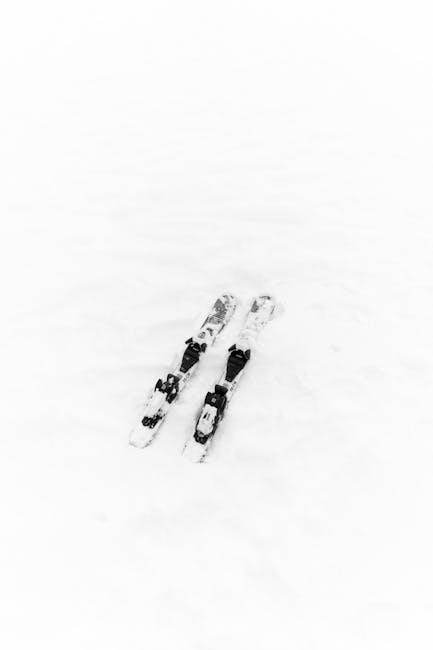
Ski bindings are the critical interface between your boots and skis, designed to protect you during falls while maintaining control during turns. Their primary function is to release your boots from the skis when subjected to forces exceeding a predetermined level, preventing potentially severe leg injuries. This release isn’t simply a detachment; it’s a carefully calibrated system responding to both rotational and upward forces commonly experienced in skiing accidents.
Bindings achieve this through a combination of mechanical components, including the toe piece, heel piece, and a standardized scale – the DIN setting. The toe piece controls forward pressure, while the heel piece manages lateral and upward release. Understanding how these components work together is fundamental to appreciating the importance of proper adjustment and maintenance. A correctly functioning binding allows for responsive skiing while acting as a vital safety net when needed.
The Importance of Correct Binding Adjustment
Precise ski binding adjustment is paramount for both performance and, crucially, safety. Incorrectly adjusted bindings can lead to unintended releases during normal skiing, disrupting your control and potentially causing falls. Conversely, bindings set too high may fail to release during a crash, increasing the risk of serious leg injuries. The DIN setting, a standardized measurement of release force, must be tailored to your individual characteristics.
Factors like weight, height, skiing ability, and ski type all influence the appropriate DIN range. A professional binding mount and adjustment ensures these variables are accurately considered. Ignoring proper adjustment compromises the binding’s protective function, turning a safety feature into a potential hazard. Regular checks and fine-tuning are also vital, as conditions and skiing style can evolve.
DIN Settings: The Core of Binding Release
DIN settings represent the fundamental mechanism controlling when a ski binding will release your boot during a fall. Derived from “Deutsches Institut für Normung” – the German Institute for Standardization – the DIN value quantifies the amount of force needed to trigger this release. It’s not a measure of binding quality, but rather a personalized setting calibrated to your specific profile.
Understanding your DIN range is critical; too low, and the binding releases prematurely, hindering control. Too high, and it may not release at all during a necessary impact. Achieving the correct DIN setting involves considering multiple factors, including skier weight, height, ability level, and the type of skiing you intend to do. Professional adjustment is highly recommended for accuracy and safety.
What is DIN and Why Does it Matter?
DIN, standing for Deutsches Institut für Normung (German Institute for Standardisation), is a standardized numerical value representing the amount of force required for a ski binding to release your boot. It’s a crucial safety feature, designed to minimize injury during a fall by allowing your ski to detach when excessive stress is applied to your legs.
The DIN setting isn’t arbitrary; it’s a personalized calibration. A correctly set DIN ensures the binding releases before your body reaches a point of potential harm. Ignoring DIN settings or using an incorrect value can lead to unwanted releases, loss of control, or, conversely, a failure to release, resulting in serious injury. Therefore, understanding and properly adjusting your DIN is paramount for safe and enjoyable skiing.
Factors Influencing Your DIN Range
Determining your appropriate DIN range isn’t a simple calculation; several interconnected factors play a significant role. Your skier weight and height are primary considerations, as heavier and taller skiers generally require higher DIN settings to resist release. Equally important is your skiing ability level – beginners and less aggressive skiers need lower settings for easier release, while expert skiers demand higher settings for greater retention.
Furthermore, the ski type and terrain influence the ideal DIN. Aggressive carving skis or those used on icy conditions necessitate higher settings. Conversely, powder skis or those used for softer snow conditions may benefit from slightly lower settings. These factors combine to create a personalized range, requiring careful consideration and potentially professional adjustment.
Skier Weight and Height
Weight and height are foundational elements in establishing a preliminary DIN range. Generally, heavier skiers exert greater force during turns, necessitating higher DIN settings to prevent premature release. Conversely, lighter skiers require lower settings to ensure the binding releases appropriately during a fall. Height contributes as it correlates with leg length and leverage.
Most DIN charts begin with weight brackets, then refine the setting based on height within that bracket. It’s crucial to use accurate weight, including clothing and gear. A significant discrepancy between weight and height may require further adjustment. Remember, these are starting points; individual skiing ability and style are equally vital considerations for fine-tuning.
Skiing Ability Level
Accurately assessing your skiing ability is paramount when determining appropriate DIN settings. Bindings are designed to release based on the forces generated by a skier, and these forces vary significantly with skill level. Beginners and intermediate skiers generally exert less force and require lower DIN settings to facilitate easier release during falls, minimizing injury risk.
Advanced and expert skiers, however, generate considerably higher forces due to aggressive technique and speed. They necessitate higher DIN settings to prevent unwanted pre-release, maintaining control at higher velocities. Self-assessment can be tricky; consider honestly evaluating your comfort level on various terrains and conditions. If unsure, consult a qualified ski technician for a professional assessment.
Ski Type and Terrain
The type of skis you use and the terrain you frequent significantly influence your DIN range. Wider, all-mountain or powder skis generally require slightly higher DIN settings compared to narrower, carving skis, due to increased leverage and potential for higher forces. Aggressive skiers tackling steep, icy slopes or moguls will also need higher settings than those enjoying groomed cruisers.
Conversely, freestyle skis, designed for park and pipe, often utilize lower DIN settings to allow for easier release during tricks and landings. Touring setups, prioritizing uphill efficiency, may have adjustable release settings to balance safety during descents with ease of movement during ascents. Always consider the primary use of your skis when determining your DIN range.
Determining Your Initial DIN Setting
Establishing your initial DIN setting isn’t guesswork; it’s a calculated starting point. Begin by referencing a DIN setting chart, readily available online from binding manufacturers or ski shops. These charts typically require your weight, height, age, skiing ability, and boot sole length (BSL). Inputting accurate data is crucial for a safe and effective starting point.
Remember, the chart provides an initial setting. It’s vital to understand this is not a final value. Fine-tuning is almost always necessary based on your on-snow experience. Start at the lower end of the recommended range and incrementally increase the setting if you experience pre-releases or feel unsafe.
Binding Compatibility: ISO Standards
Ski bindings aren’t universally interchangeable; compatibility relies heavily on adherence to international safety standards. The International Organization for Standardization (ISO) dictates these standards, primarily through ISO 5355 and ISO 9523. ISO 5355 defines the functional requirements and testing methods for alpine ski bindings, ensuring consistent release characteristics.
ISO 9523, conversely, specifies the requirements for ski boots, particularly the boot sole. This standard ensures the boot sole is compatible with the binding’s release mechanism. Mismatched boots and bindings can compromise safety, potentially leading to injuries. Always verify your boot sole meets the relevant ISO standard before mounting bindings.
ISO 5355 and ISO 9523 Explained
ISO 5355 meticulously details how ski bindings must function, outlining testing protocols for release force, retention, and overall reliability. It covers everything from the binding’s mechanical components to its response under various impact conditions, guaranteeing a predictable and safe release when necessary. This standard isn’t merely about force; it’s about consistent performance.
ISO 9523 focuses on the ski boot sole, defining dimensions, materials, and the critical interface between boot and binding. It categorizes boot soles, ensuring compatibility with different binding types. A boot conforming to ISO 9523 will reliably engage and disengage from a compatible binding, preventing unwanted releases or, conversely, failure to release during a fall.
Adjusting Bindings for Different Ski Disciplines
Optimal binding settings aren’t universal; they depend heavily on your skiing style and the terrain you frequent. Alpine skiing generally requires higher DIN settings due to higher speeds and forces, prioritizing retention for carving performance. Conversely, freestyle skiing demands lower DIN settings for quicker release during tricks and inversions, minimizing injury risk.
Touring skiing presents unique challenges. Bindings must balance uphill efficiency with downhill safety. DIN settings often fall between alpine and freestyle, but are frequently adjusted based on snow conditions and tour difficulty. Understanding these nuances is crucial; a binding properly tuned for one discipline can be dangerously inappropriate for another.
Alpine Skiing DIN Ranges
For alpine skiing, DIN settings typically range from 3 to 14, though these are broad guidelines. Beginners, even adults, often start around 3-5, prioritizing easy release. Intermediate skiers, comfortable on groomed runs, generally fall within 6-9, balancing retention and release. Advanced and expert skiers, tackling challenging terrain at speed, may require settings of 10-14, demanding greater force for release.
However, individual adjustments are vital. Factors like weight, height, skiing ability, and boot sole length all influence the ideal DIN setting. It’s crucial to remember that these ranges are starting points, and professional adjustment is highly recommended to ensure optimal safety and performance on the slopes.
Freestyle Skiing DIN Ranges
Freestyle skiing demands a different approach to DIN settings compared to alpine skiing, typically falling between 3 and 8. This lower range reflects the need for quicker release during tricks and potential falls involving rotational forces. Beginners in freestyle should start at the lower end, around 3-4, prioritizing safety while learning.
Intermediate and advanced freestyle skiers, performing more complex maneuvers in terrain parks, generally use settings between 5-8. The emphasis is on allowing release during unexpected landings or falls, minimizing injury risk. Precise adjustment is paramount, considering skier weight, ability, and the specific style of freestyle skiing practiced. Professional fitting is strongly advised.
Touring Skiing DIN Ranges
Touring ski bindings require careful DIN setting adjustments due to the varied terrain and demands of backcountry skiing, generally ranging from 4 to 10. A slightly higher DIN setting is often recommended compared to resort skiing, accounting for the increased forces encountered in off-piste conditions and potential for deeper snow immersion.
Beginner backcountry skiers should start conservatively, around 4-6, while experienced tourers may utilize settings between 7-10, depending on weight, ability, and the steepness of the terrain. Pin bindings, common in touring, demand precise calibration. Regular checks are crucial, as conditions change rapidly. Professional fitting and guidance are highly recommended for optimal safety and performance in the backcountry.
The Role of Brake Width in Binding Size
The brake width of a ski binding is a critical factor ensuring ski control during a fall, preventing runaway skis. It must correspond closely to the width of your skis, ideally within a few millimeters. Too narrow, and the ski can slip out; too wide, and it may interfere with turning.
Modern skis, particularly those designed for powder or all-mountain use, often have wider waists, necessitating bindings with correspondingly wider brakes. Brake widths typically range from 60mm to 130mm or more. Selecting the correct brake width isn’t directly related to DIN setting or boot sole length, but it’s a vital component of a properly fitted and functioning binding system, enhancing safety and performance on the slopes.
Boot Sole Length (BSL) and Binding Size
Boot Sole Length (BSL), measured in millimeters, is a fundamental measurement for accurate binding adjustment. It’s not your boot size, but the actual length of the boot’s sole. This measurement dictates the forward pressure applied by the binding, influencing release consistency.
Bindings are categorized by a BSL range; selecting a binding that accommodates your BSL is crucial. An incorrect BSL setting can compromise the binding’s ability to release properly during a fall, increasing injury risk. Professional ski technicians use specialized tools to precisely measure BSL and adjust the binding accordingly. Always verify the BSL setting after any binding adjustment or boot sole replacement to ensure optimal safety and performance.
Professional Binding Mounting and Adjustment
Entrusting binding mounting and adjustment to a certified ski technician is paramount for safety and performance. They possess the expertise and specialized tools to ensure precise installation, adhering to ISO standards. Correct mounting angle and placement are critical for optimal ski control and reducing injury risk.
A technician will accurately determine your BSL, assess your skiing ability, weight, and ski type to calculate the appropriate DIN setting. They’ll meticulously adjust the binding’s release values, forward pressure, and brake width. Don’t attempt self-installation; improper adjustments can have severe consequences. Regular professional checks are recommended, especially after significant changes in weight or skiing level.
Self-Checking and Fine-Tuning Your Bindings
While professional adjustment is vital, skiers can perform basic self-checks before each outing. Ensure all screws are tightened and that the boot enters and exits the binding smoothly. Verify the DIN setting hasn’t been accidentally altered. A simple “wiggle test” can reveal looseness, but never attempt to adjust the DIN yourself.
Pay attention to how your bindings feel while skiing. Repeated premature releases suggest a DIN setting that’s too high, while a failure to release during a fall indicates it’s too low. Note these observations and consult a technician for fine-tuning. Remember, self-checks are supplementary to professional maintenance, not replacements.
Common Binding Issues and Troubleshooting
Several issues can arise with ski bindings. Difficulty clipping in or out often indicates debris accumulation or a binding mechanism needing lubrication. Repeated unintentional releases, beyond what your DIN setting suggests, could signal worn components or improper mounting. Conversely, a binding that doesn’t release during a fall is a serious safety concern requiring immediate attention.
Loose screws are a frequent problem; regularly check and tighten them. If you suspect internal damage, or are unsure about any binding function, do not attempt a repair yourself. Seek a qualified ski technician for diagnosis and repair. Ignoring binding issues compromises safety and performance on the slopes.
Safety Considerations and Regular Maintenance

Ski binding safety hinges on proper function and consistent maintenance. Always prioritize professional mounting and adjustment by a certified technician, ensuring adherence to ISO standards. Regularly inspect your bindings before each ski day for loose screws, debris, or visible damage. A functional binding is crucial for preventing injuries during falls.
Annual maintenance by a qualified technician is highly recommended, including a thorough inspection, cleaning, and lubrication of all components. Never modify bindings yourself; alterations can compromise their release mechanisms. Understanding your DIN setting and ensuring it’s appropriate for your ability and skiing conditions is paramount for safe enjoyment on the mountain.

Resources for Further Information and Assistance
For in-depth knowledge and support regarding ski bindings, several resources are readily available. The official websites of major binding manufacturers – Salomon, Marker, Look, Tyrolia, and Atomic – offer detailed specifications, FAQs, and instructional videos. Professional ski shops staffed with certified technicians provide expert advice and binding services.
Organizations like the Professional Ski Instructors of America (PSIA) and the American Mountain Guides Association (AMGA) offer educational resources on ski safety and equipment. Online forums and communities dedicated to skiing can provide valuable insights from experienced skiers. Remember, when in doubt, consult a qualified professional to ensure your bindings are correctly adjusted and maintained for optimal safety and performance.

Understanding Release Values and Force
Release values, quantified by the DIN setting, represent the amount of force needed for a ski binding to release the boot during a fall. This standardized measurement, originating from Deutsches Institut für Normung (DIN), is paramount for skier safety. Bindings are engineered to release predictably, reducing the risk of injury during twisting or impact events.
Understanding this force is crucial; too low a setting can lead to premature release, while too high a setting increases the risk of injury if the binding doesn’t release when needed. Proper DIN setting considers skier weight, height, ability, and ski type, ensuring a balance between secure hold and timely release.